> ## Documentation Index
> Fetch the complete documentation index at: https://docs.sprig.com/llms.txt
> Use this file to discover all available pages before exploring further.
# Microsoft Entra ID
To enable SSO with Microsoft Entra ID, complete the following:
1. Contact [support@sprig.com](mailto:sso@sprig.com) to claim the email domain(s) that your SSO users will use to sign in.
2. Log into your Sprig account and navigate to **Settings >** [**Single Sign-On**](https://app.sprig.com/settings/sso).
3. Select the **SSO Enabled** option, and click **Save**.
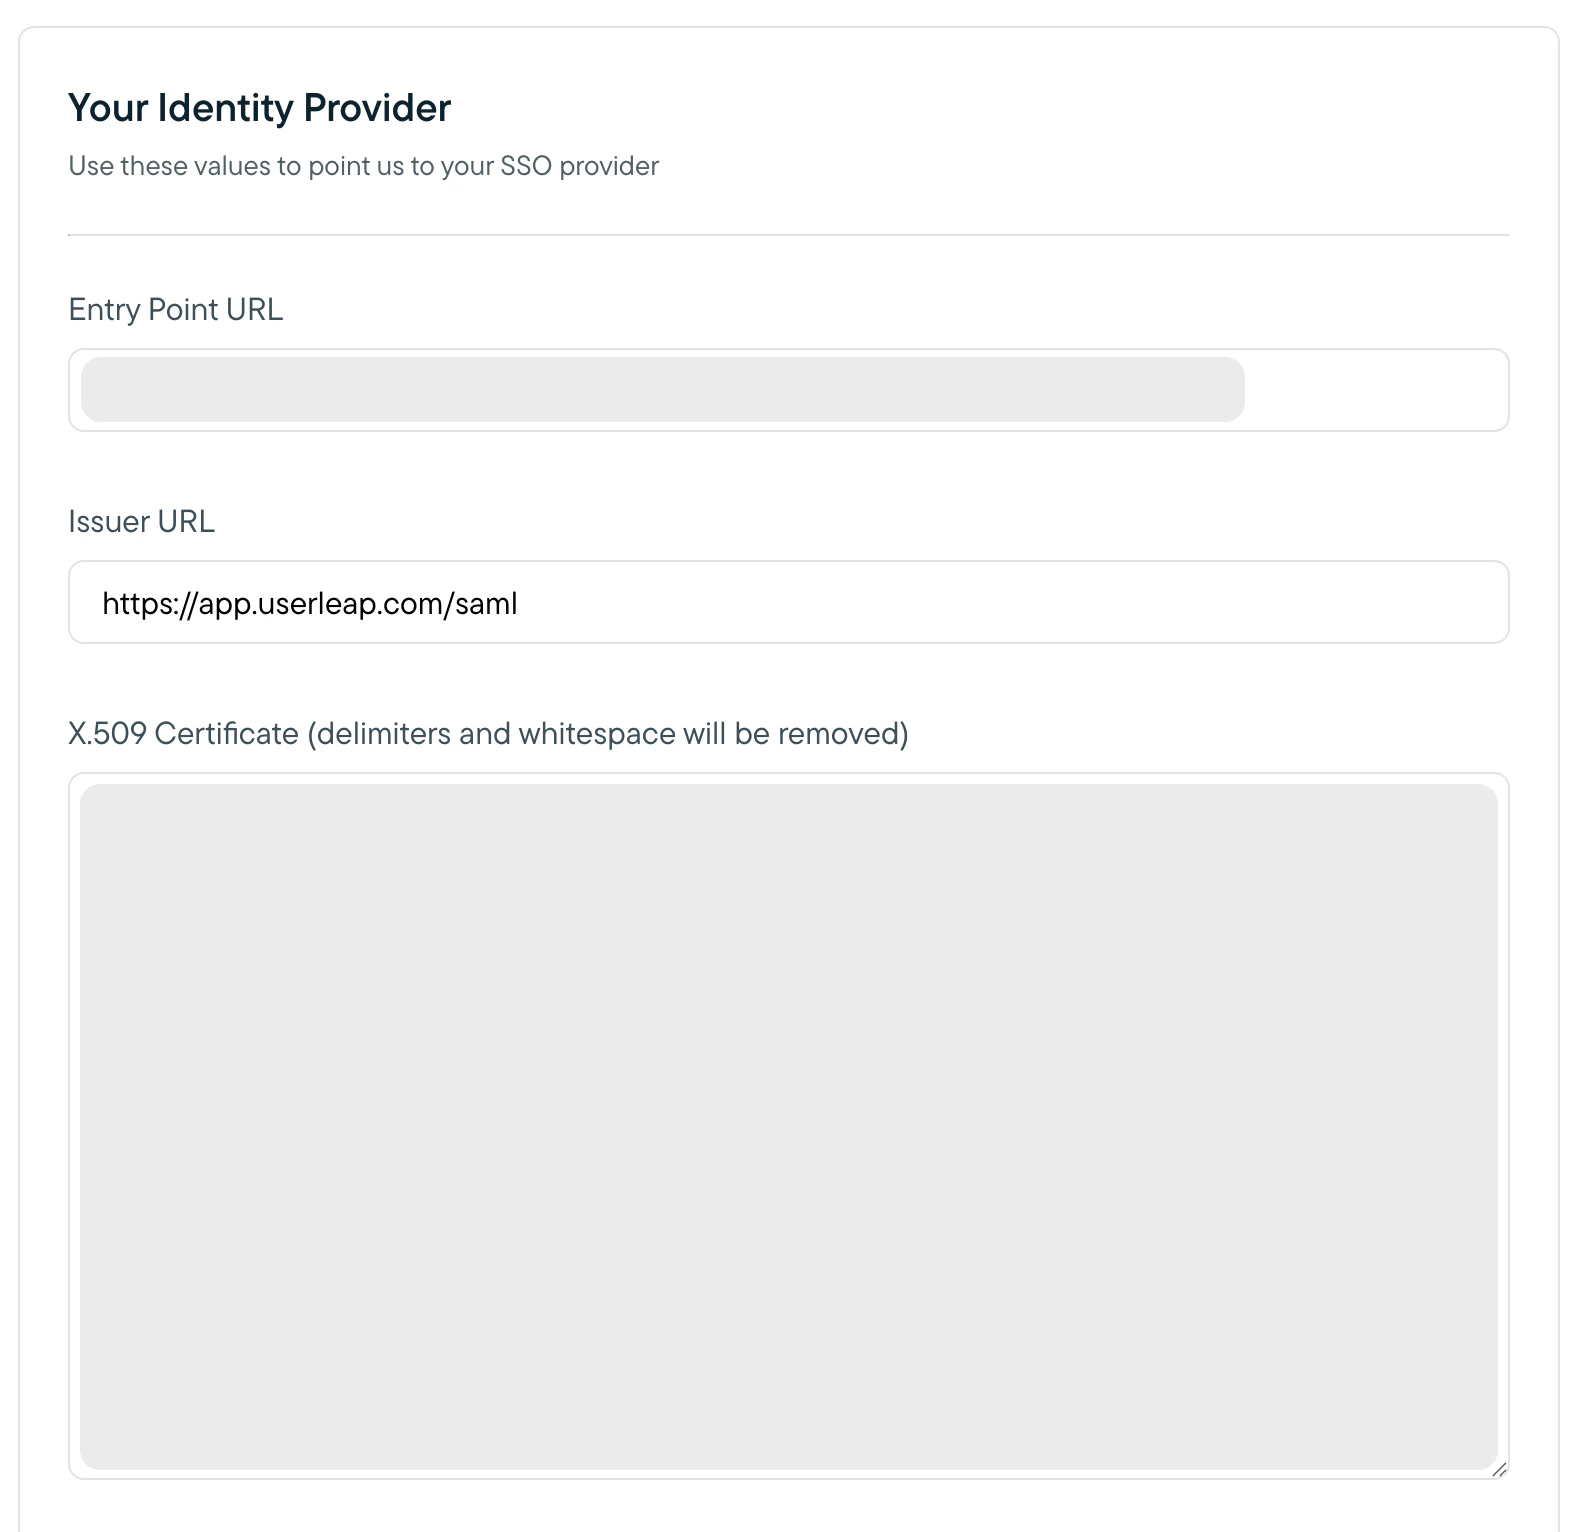
4. An **Important Values** section should appear. Copy the value of the **Entity URI** field into the **Issuer URL** field in the **Your Identity Provider** section, and click **Save**. Take note of the Entity URI and the ACS URL values provided by the **Important Values** section, as you will use them in your Microsoft Entra ID client configuration.
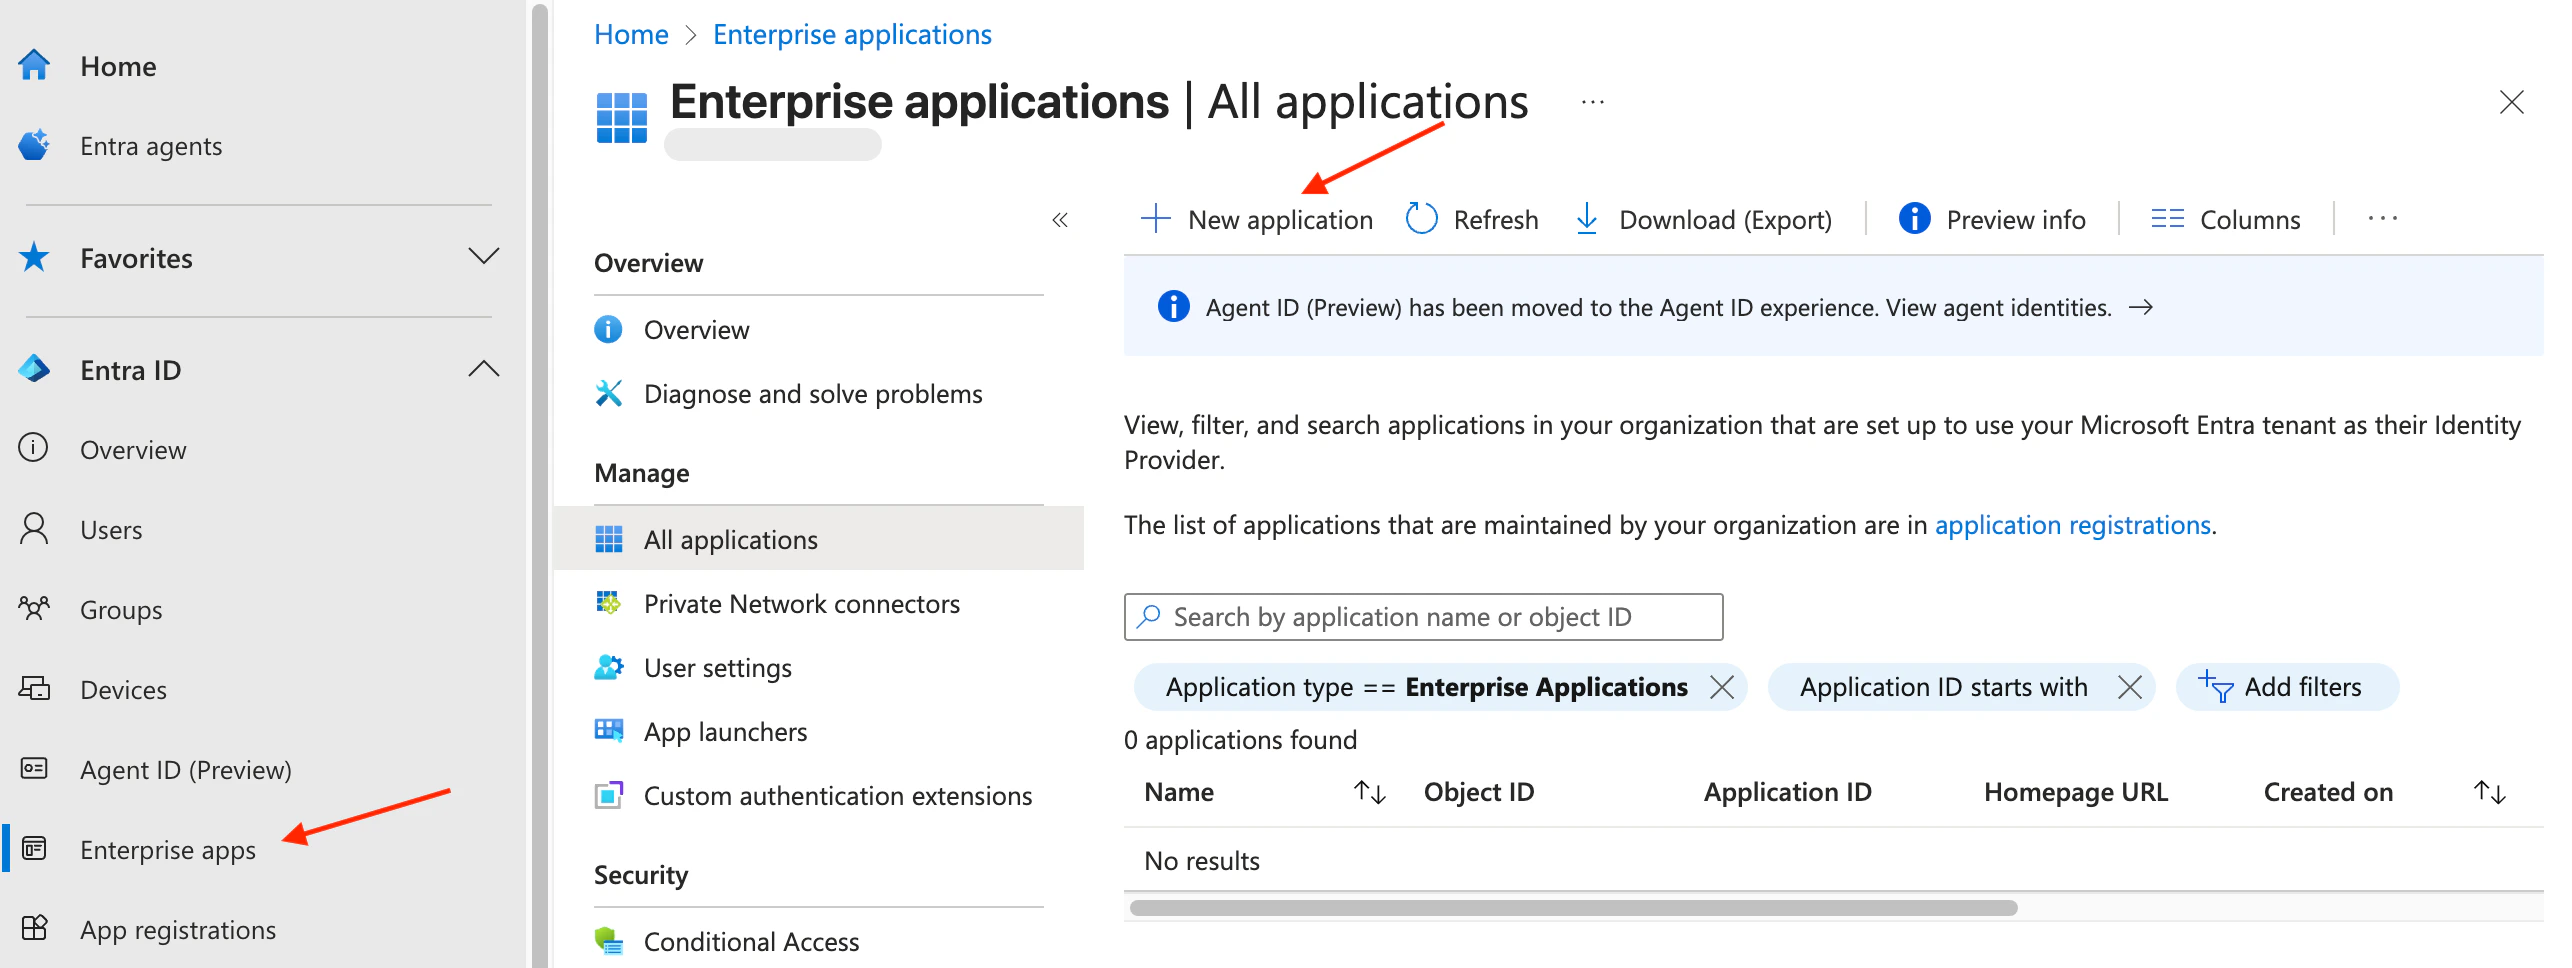
5. Log into your Microsoft Entra admin center. Navigate to the Enterprise app page. Click “+ New application” at the top of the page and then “+ Create your own application” in the window that opens on the right.
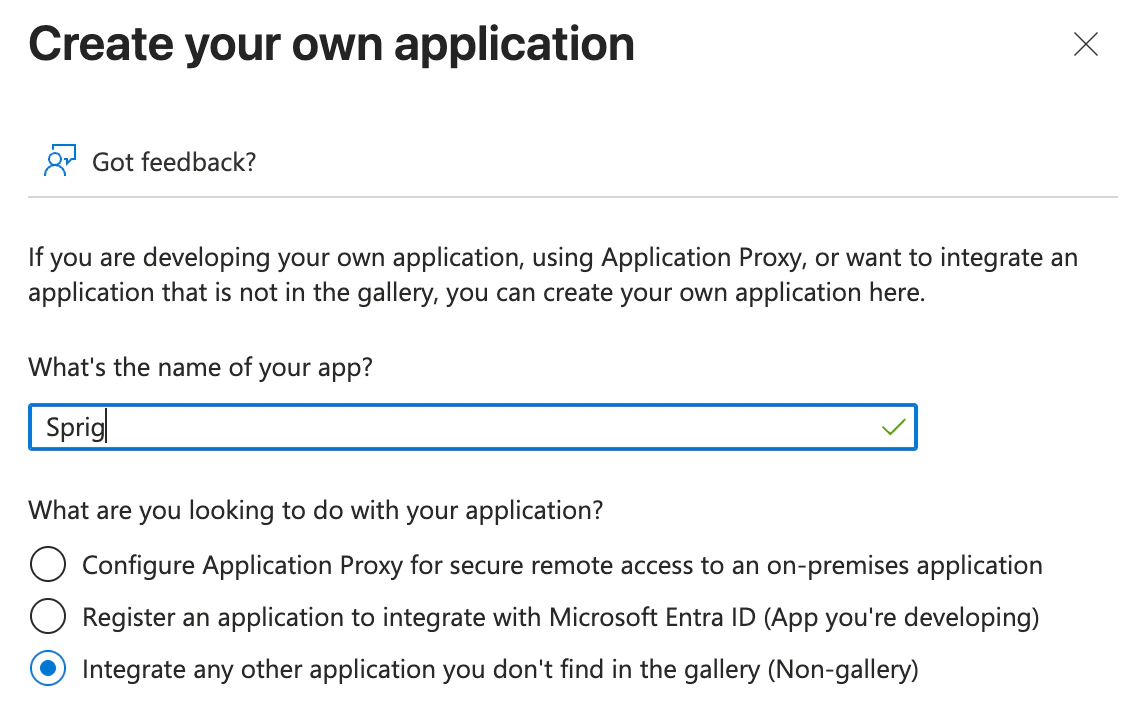
 6. In the “What’s the name of your app?” field, enter “Sprig” or whatever you would like the application to be called, and select “Integrate any other application you don’t find in the gallery (Non-gallery)” and click Create.
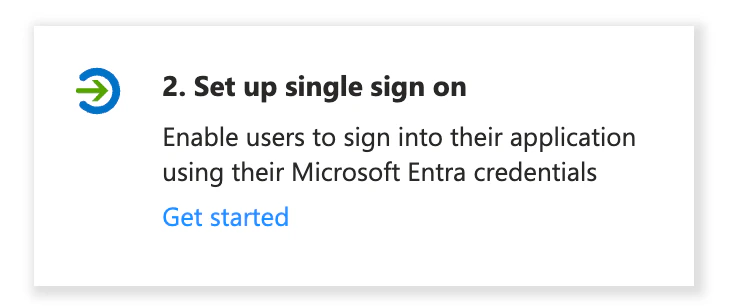
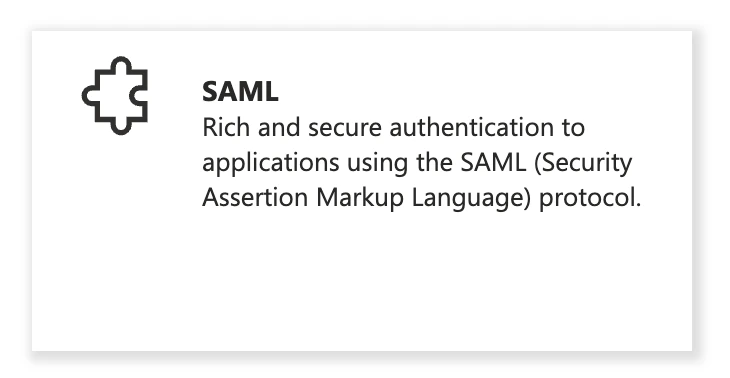
 7. Under “Set up single sign on,” click “Get started” and choose SAML.
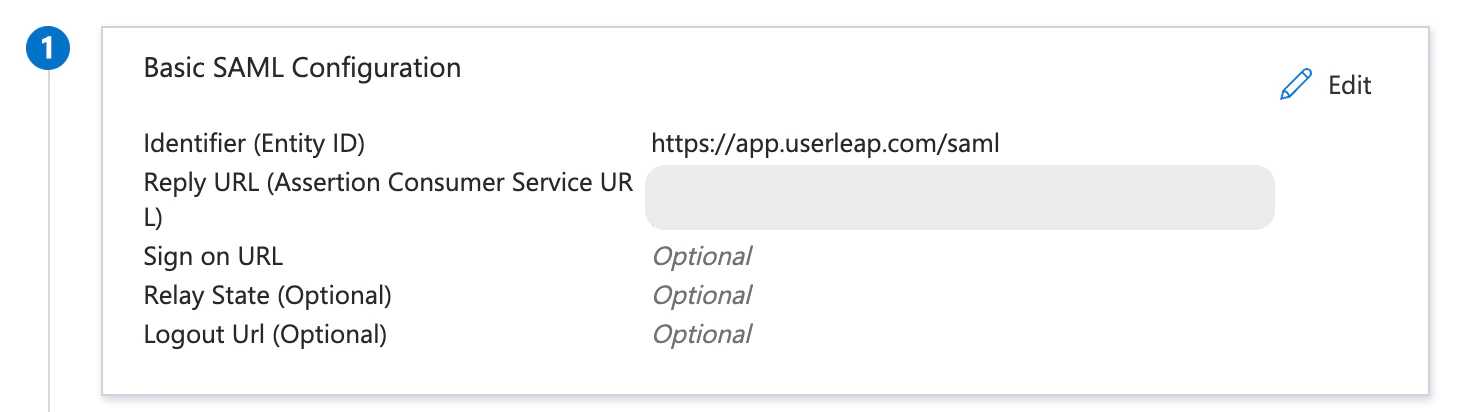
 8. In the Basic SAML Configuration section, click Edit, and:
1. Paste the Entity URI from the Sprig dashboard into the Identifier (Entity ID) field
2. Paste the ACS URL into the Reply URL (Assertion Consumer Service URL) field.
8. In the Basic SAML Configuration section, click Edit, and:
1. Paste the Entity URI from the Sprig dashboard into the Identifier (Entity ID) field
2. Paste the ACS URL into the Reply URL (Assertion Consumer Service URL) field.
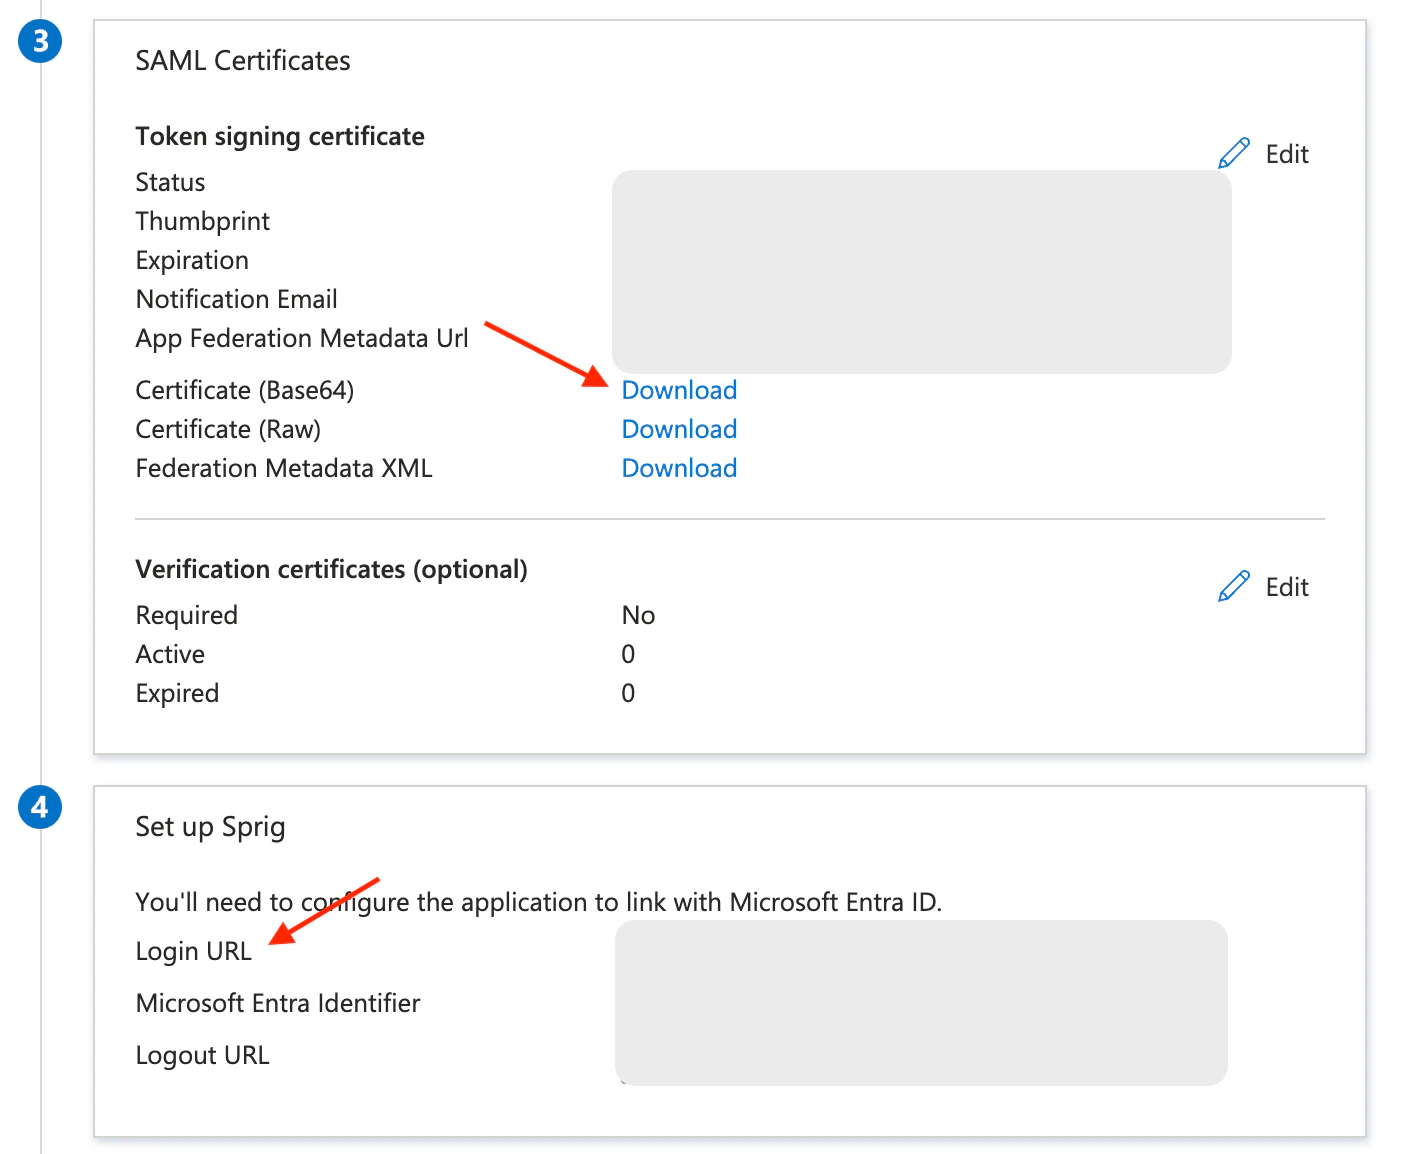
 9. Copy the Login URL from section 4 in the Microsoft Entra admin center and paste it into the Entry Point URL field in the Sprig dashboard.
1. Then, click download next to Certificate (Base64) from section 3 in the Microsoft Entra admin center to download the X.509 certificate.
2. Open the downloaded certificate in a text editor.
3. Copy the contents of the certificate, paste it into the X.509 Certificate field in the Sprig dashboard, and click Save.
9. Copy the Login URL from section 4 in the Microsoft Entra admin center and paste it into the Entry Point URL field in the Sprig dashboard.
1. Then, click download next to Certificate (Base64) from section 3 in the Microsoft Entra admin center to download the X.509 certificate.
2. Open the downloaded certificate in a text editor.
3. Copy the contents of the certificate, paste it into the X.509 Certificate field in the Sprig dashboard, and click Save.
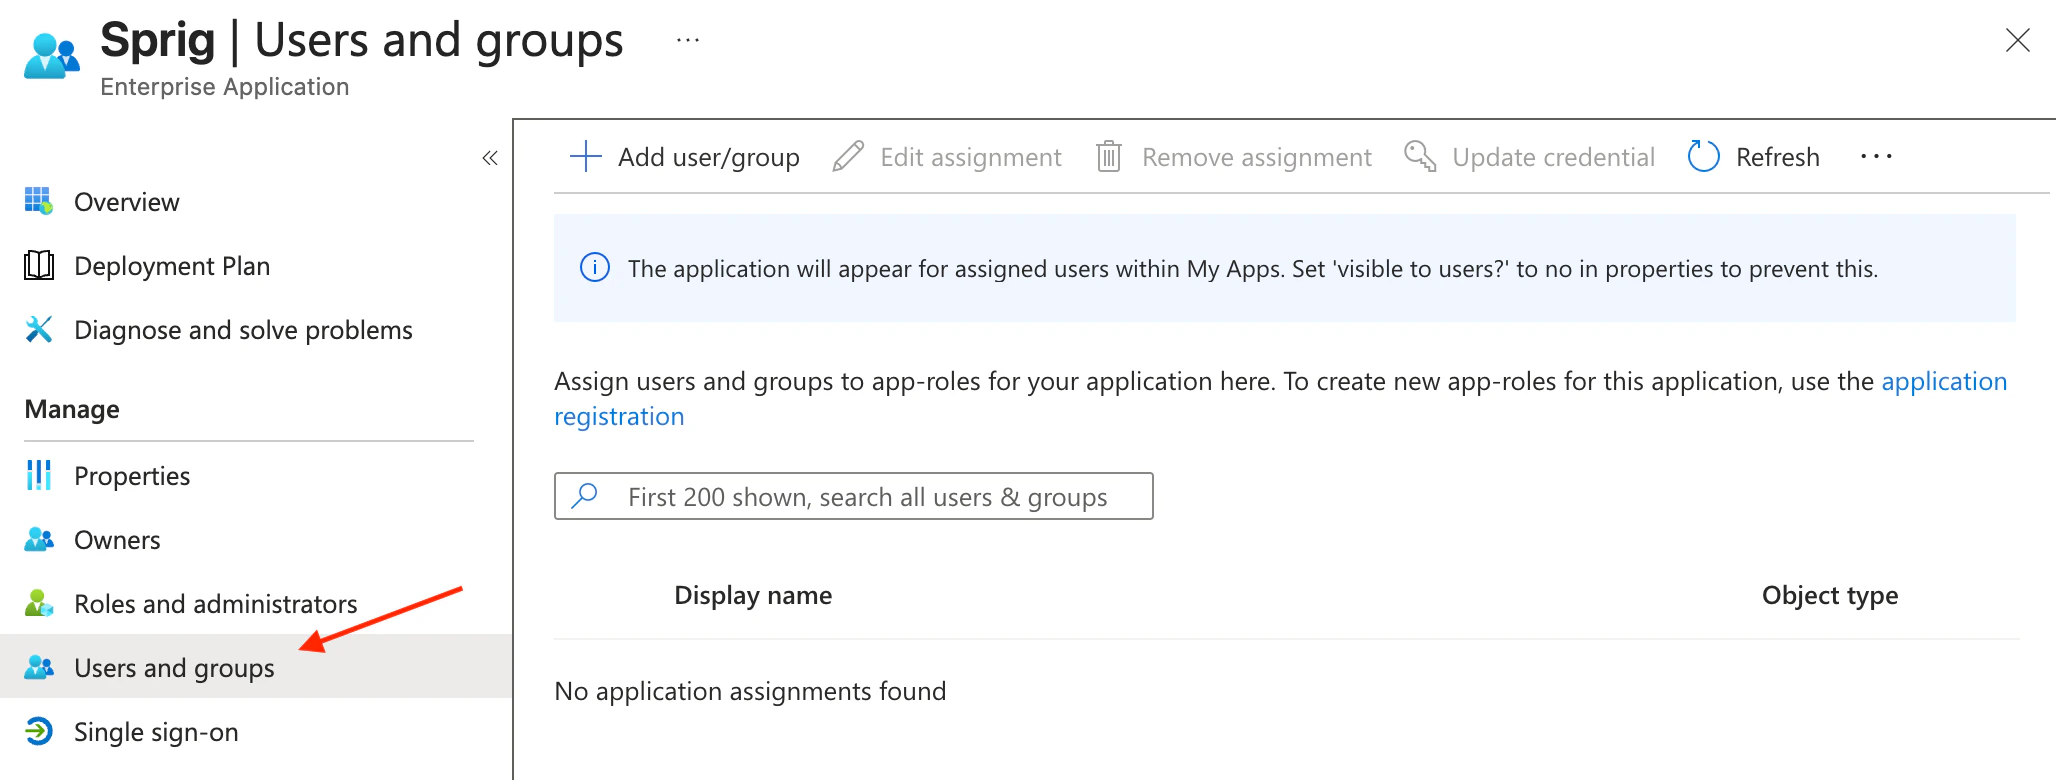
 10. Back in the Microsoft Entra admin center, navigate to the “Users and groups” page to add users or groups to the application. The users or groups that you add will determine which users will be able to use SSO to login to Sprig.
 Users that are assigned to the Microsoft Entra ID application integration will now be able to sign in using the Sprig [SSO login page](https://app.sprig.com/login/sso).