

Getting Started
Overview
The Sprig React Native SDK, when installed in app, allows you to track your customer’s in-product behavior and display Sprig studies when they perform certain actions.Requirements
- Join your teammates on Sprig (check with your Sprig admin whether team discovery is on, or simply have a team member invite you via your email address). This will give you access to your team’s environment IDs, as well as the interactive Installation Guide.
- Ensure you have access to your React Native codebase, and can deploy to a development and/or production environment
- Please check the platform-specific requirements:
Install React Native Module
Obtain an Environment ID
Sprig provides two environments, Development and Production, each with its own corresponding ENVIRONMENT_ID (which can be found in Integrations > React Native Module). The Development environment is recommended for initially setting up and verifying your installation. Then, you can use the Production environment to deploy studies to real users.Install with npm/Yarn
Use the following shell command to install the Sprig SDK through npm or YARN. Note that you will have to update the SDK manually to receive the latest functionality. We recommend you update the package monthly for improved functionality and bug fixes.NPM
Yarn
pod install. And if you are updating, it’s best to remove the Podfile.lock and run pod repo update first. So from your app top-level directory, run the following commands:
Initialize the SDK
Then, in your application, initialize Sprig with your ENVIRONMENT_ID:configure() will only accept 1 environment ID, and calling it multiple times with different IDs will have no effect.
Note: If an installation error occurs on incompatible react versions, you may need to use the --legacy-peer-deps option
Attempt to invoke virtual method'boolean com.facebook.react.uimanager.FabricViewStateManager.hasStateWrappper(), you can either update your react-native dependency to version 0.68.2 or higher, or you can add the following snippet to the dependencies in the build.gradle file under the app directory. The version block is necessary in the snippet.
Study Previews
Identify Users
Identifying users ensures that a user’s actions are all associated with the same profile so they can be targeted. Properly identifying users helps ensure:- Your users have a consistent experience across platforms, and do not see the same study multiple times
- You can accurately target the right users
- You are billed for the correct number of Monthly Unique Users (MUUs)
Set User ID
Sprig allows you to differentiate users by setting a unique USER_ID. You may want to ensure consistency between the User IDs sent to Sprig and the ones in your internal database, product analytics/CDP, or data warehouse. You can also use an anonymizing function or hash. A good User ID is…- Unique: Two users should not share the same User ID.
- Mappable: User IDs sent to Sprig should map back to your internal User IDs, either directly or anonymously.
- Static: Once assigned, a User ID should not change.
setUserIdentifier() to identify a user with any string less than 256 characters. This function can be called multiple times safely, and stores the identifier via local storage. We recommend you set the User ID whenever the user logs in to your app, as well as after the installation snippet (if the user is already logged in).
Logout
When a user logs out of your app, make sure to log out of Sprig. This will prevent new activity from being associated with an incorrect user. Note that if you calllogout() on an unauthenticated user, Sprig will assign them a new profile and count this new user separately toward your MTU limit.
Track Events
Sprig uses events to trigger (display) studies after the user performs a specific action. They can also be used as a filter to target users who have previously performed an action. Once you’ve installed the Sprig SDK, the next step is to configure the tracking of events that you would like to use to trigger a study. For mobile SDKs, you must configure Code events. (Sprig also offers No-Code events, but these are only available on web platforms.) To track a Code event, use:Track Attributes
Sprig allows you to track attributes, which can provide more context about the user to help you better understand their feedback. You can also use these attributes to filter your audience and target specific kinds of users. Some example attributes that can be tracked are:- Plan type
- Super users / power users
- Company
ATTRIBUTE_NAMEmust be a string less than 256 characters, and cannot start with an!(these names are reserved for use by Sprig)ATTRIBUTE_VALUEmust be a number, boolean, or string less than 256 characters
Set Email Address
Setting the user’s email address is optional. Setting emails is not required for web or mobile studies, but can be used to target users or create a Group of users based on their email. Check your organization’s guidelines around personally-identifiable information before sending email addresses to Sprig.Listening to Lifecycle Events
Sprig emits lifecycle events as the SDK initializes and as surveys are presented, answered, and closed. You can subscribe to these to run your own logic — for example, pausing background media while a survey is on screen, or logging when a survey completes.Subscribe with
addEventListener, which returns a subscription you can later remove:
Sprig.SprigEventName constants. The callback receives an event object that always includes the event type, plus any fields relevant to that event (for example, surveyId on survey events).Commonly used events
sdkReady— the SDK has finished initializingsurveyWillPresent/surveyPresented/surveyAppeared— a survey is being shownsurveyCloseRequested/surveyWillClose/surveyClosed— a survey is closingsurveyCompleted— the user completed a surveyvisitorIdUpdated— the visitor ID changedquestionAnswered— the user answered a question within a surveyloggingEvent— SDK diagnostic logs, useful for debugging
Sprig.SprigEventName enum for the full list of events.Removing listeners
Test & Deploy
To verify your SDK is configured properly, we recommend testing with your developmentENVIRONMENT_ID.
- Create a survey in your Sprig Development Environment
- Choose an approved event as a trigger for your study
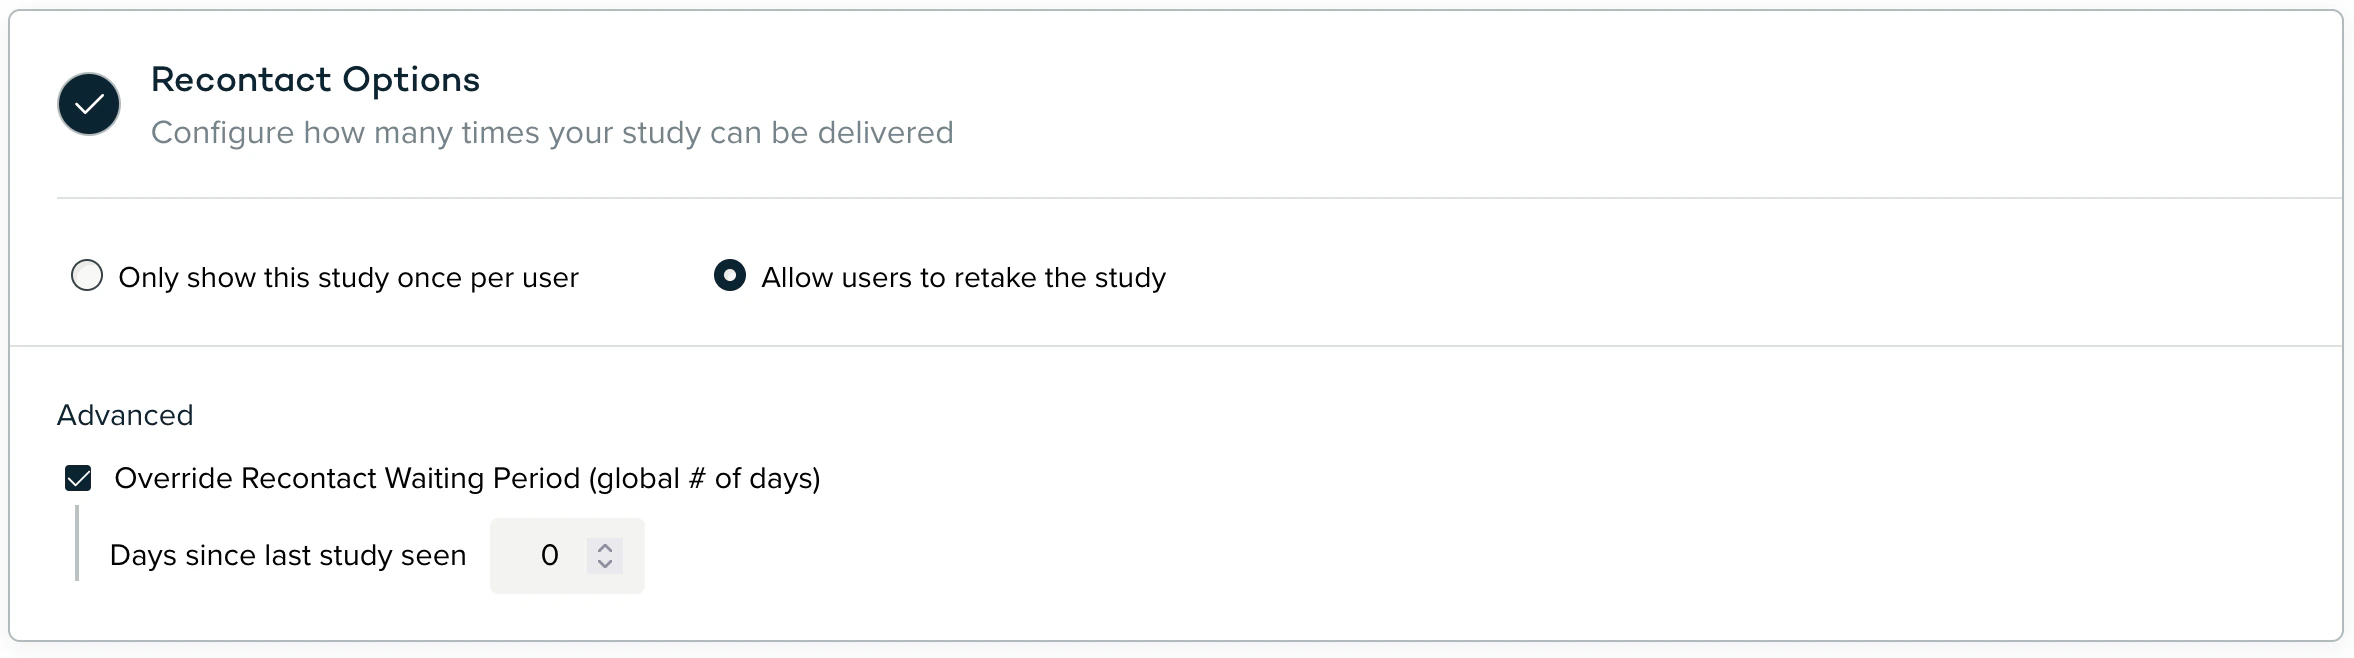
- [For testing purposes only] Allow users to retake the survey and set the recontact waiting period to 0 days
- Track the approved event from your app and confirm that the survey appears