

To enable SSO with OneLogin, complete the following:Documentation Index
Fetch the complete documentation index at: https://docs.sprig.com/llms.txt
Use this file to discover all available pages before exploring further.
- Contact support@sprig.com to claim the email domain(s) that your SSO users will use to sign in.
- Log in to Sprig and go to Settings > Single Sign On.
- Select SSO Enabled option, and click Save.
- An Important Values section will appear. Take note of the values provided. You will use them to configure your OneLogin integration in step 8.
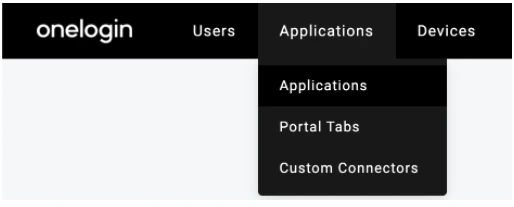
- Log in to your OneLogin account and go to the Administration section. Navigate to the Applications page.
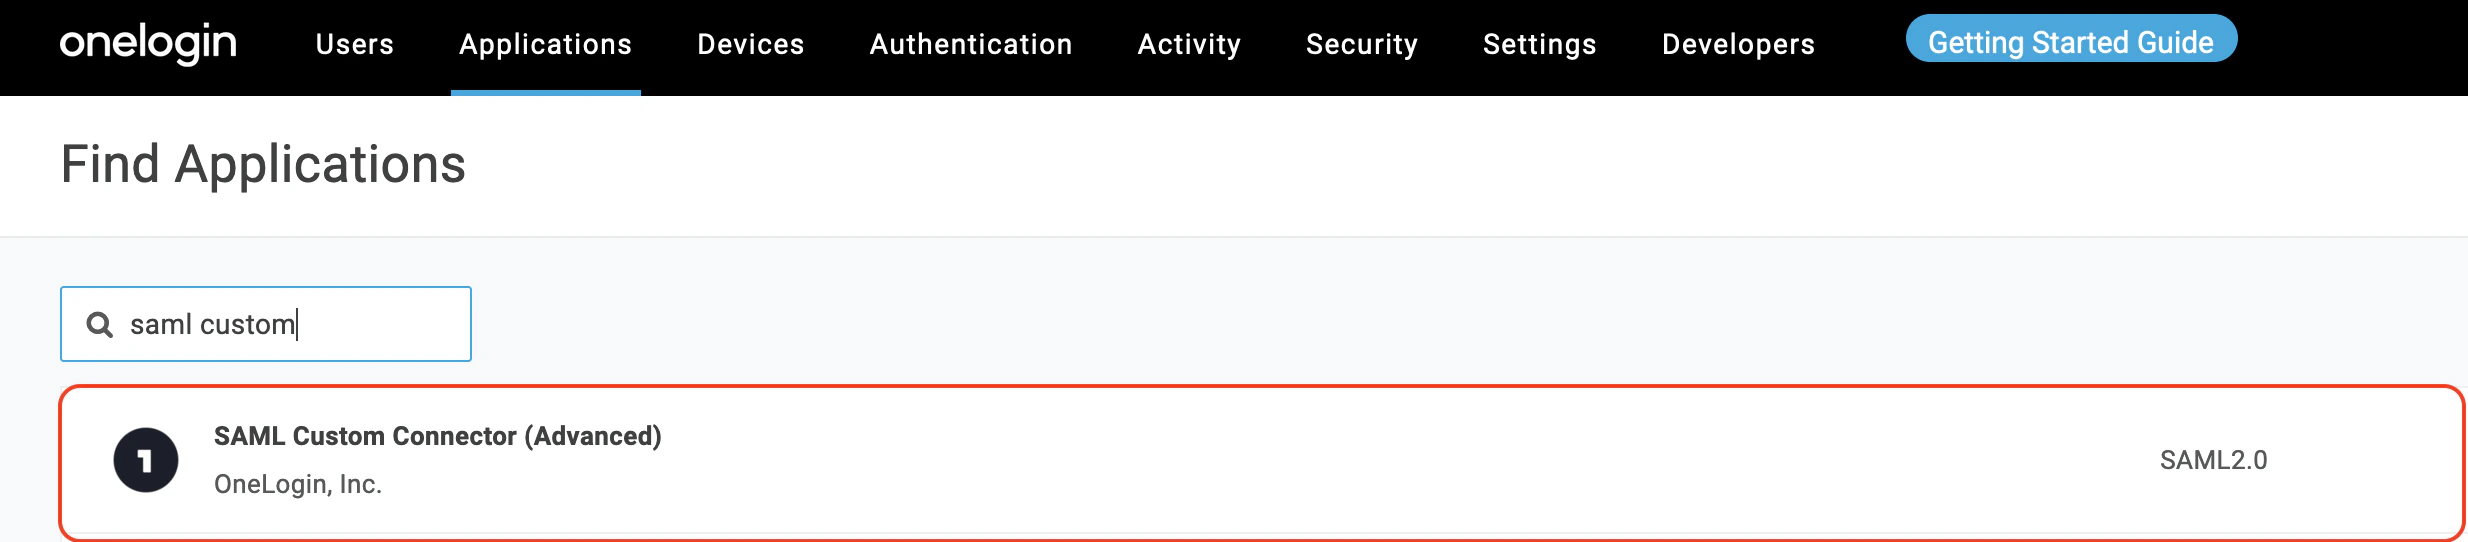
- Click the Add App on the right side of the page. In the search field, enter Saml Custom Connector. Choose SAML Custom Connector (Advanced) provided by OneLogin Inc:
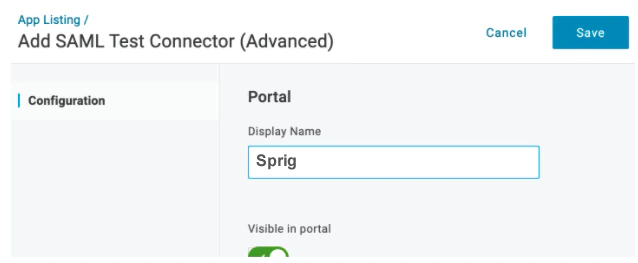
- In the Display Name field, enter a name and click Save.
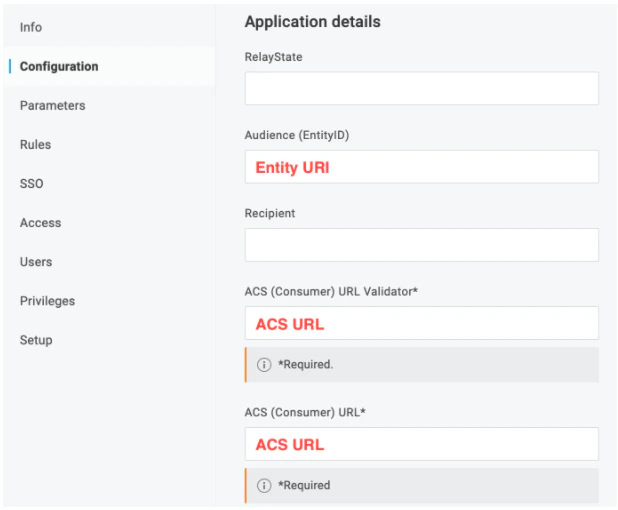
- Click Configuration. Use the Important Values you were provided in step 4 to cut and paste the Entity URI into the Audience (EntityID) field, and the ACS URL into both the ACS (Consumer) URL Validator field and the ACS (Consumer) field.
- Click Parameters. Click
 to add a parameter.
 - Enter
namein the Field name field. Select the Include in SAML assertion option. Click Save.
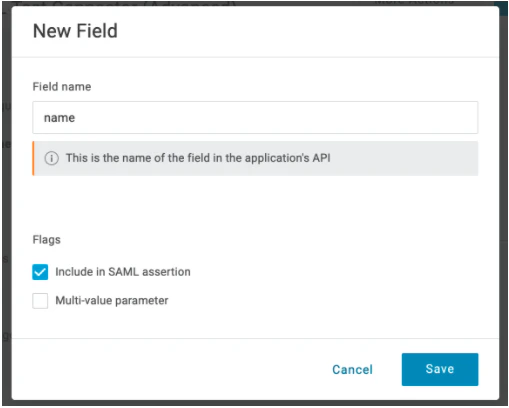
- In the Value drop-down list select Name.
- Click again on Parameters. Click to add another parameter.
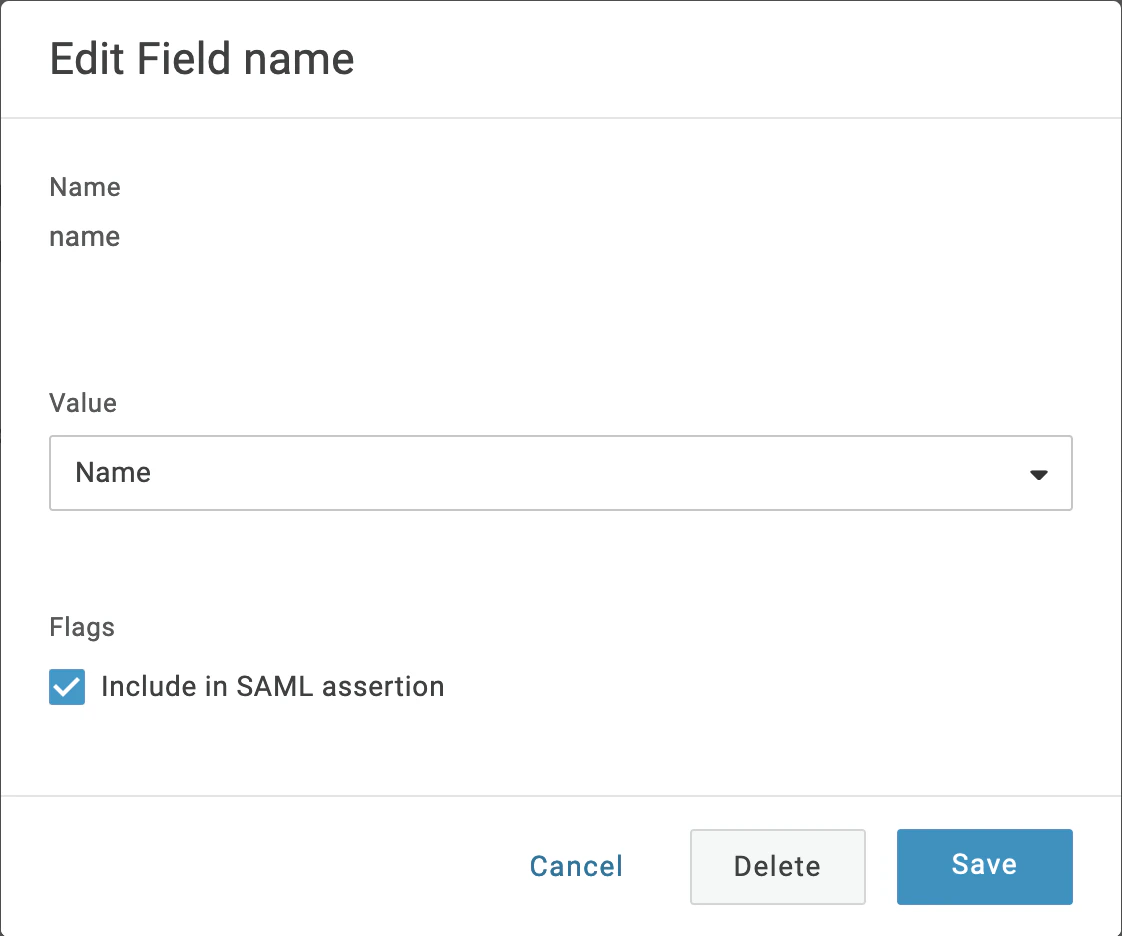
- Enter
rolein the Field name field. Select the Include in SAML assertion option. Click Save. - In the Value drop-down list select - Macro - . Either enter
admin,editor,developer, orviewerin the field. Sprig roles are described here. Roles can be configured on a per-user basis using user attribute macros. If you don’t have the appropriate attribute configured for users yet, you can choose “- Macro -” again and enteradmin, and all assigned users will receive “admin” permissions. - You will configure the SAML settings. Click on the SSO tab. In the SAML Signature Algorithm dropdown, select SHA-256.
- Navigate to the Sprig’s Settings>Single Sign-On. Copy the values from the SSO tab in the previous step into the corresponding fields in the Your Identity Provider section:
- Issuer URL → Issuer URL
- SAML 2.0 Endpoint → Entry Point URL
- Now in the OneLogin SSO tab, click View Details link under the X.509 Certificate field. A new page will appear. Copy the text inside the X.509 Certificate field and paste it into the X.509 Certificate field in Sprig’s Settings>Single Sign-On. Click “Save”.