Segment - to be split up
Use Segment to trigger studies and collect user and event data without the need to install the Sprig SDK. Send your Sprig user insights to any Segment-connected app.
Use Segment to trigger studies and collect user and event data without installing the Sprig SDK. Send your Sprig user insights to any Segment-connected app.
You can use Segment to trigger studies and collect user and event data - configuring Segment as a source and Sprig as the destination. For example, you can use Segment to:
- Send custom events and page visits to Sprig.
- Send User IDs and other attributes to Sprig.
- Trigger a Sprig study.
You can also send your Sprig user insights to any Segment-connected app - configuring Sprig as a source and Segment as the destination.
The next section will describe the steps you need to take to use Segment as a source.
Segment as a Source, Sprig as a Destination.
There are two steps to this task, 1) creating or locating a source of the Segment events, and 2) adding Sprig Actions as a destination. If you have data from your backend platform you’d like to use in Sprig, we recommend configuring Sprig Classic from that source as well. If you have not created a Segment source before, Segment provides guidance here.
Segment Source Features Supported by Sprig
In addition, certain Segment sources and frameworks support the transfer of different data types to Sprig. The following table shows the Segment sources and events supported by Sprig. For example, the table shows that the Actions Destination Framework supports using Segment events to trigger Sprig studies on web and mobile. Our recommendation is to integrate with Sprig Actions which installs the Sprig SDK and triggers studies on web and mobile, while Classic only can use events to filter, not trigger studies. However, if there are backend events you’d like to forward to Sprig, we suggest also configuring Sprig Classic as a destination. Classic must be used on: Backend server sources and React Native applications
For iOS, Sprig only supports Segment's actively supported analytics-swift package. Sprig does not support analytics-ios
Feature \ Destination Framework | Actions | Classic |
|---|---|---|
Source: JavaScript | ✅ | ✅ |
✅ | ✅ | |
✅ | ✅ | |
✅ | ✅ | |
Events as Triggers | ✅ (JavaScript only) | ❌ |
Events as Filters | ✅ | ✅ |
Events: Track, Identify, Alias | ✅ | ✅ |
Connecting Segment to Sprig
- In Segment, click Connections, then click Sources.
- Click the Source you want to use Sprig as a Destination.
- Click Add Destination.
- In the Filter Destinations field, type Sprig.
- Click on Sprig, then click Configure Sprig.
- Give the Destination a name.
- Select an existing JavaScript website or mobile source to connect to Sprig (Actions).
- Find your Environment ID on Connect > JavaScript. Use the 1. Development Environment ID for testing studies and the Production Environment ID for your live study environment. When you configure the Destination, input the appropriate Environment ID.
- Select Quick Setup to start with pre-populated subscriptions or Customized Setup to configure each action from scratch. Click Configure Actions to complete setup.
After the Sprig (Actions) destination has been installed, your JavaScript website source will automatically initialize the Sprig SDK when Segment is initialized. Then, based on your configuration, Segment Identify, Track, and Alias events can be forwarded to the Sprig SDK without needing to add Sprig-specific code to your website.
Validating your Setup
Segment - Identify
If you’re not familiar with the Segment Specs, take a look to understand what the Identify method does. An example call would look like this:
analytics.identify('userId123', {
  firstName: 'James',
  lastName: 'Gibbon'
});
Open the web page or app in your browser and run this command in your web console. In Segment, go to the corresponding source and click Debugger. You should see something similar to the following:

Validating Identify
Once Identify events are being triggered in your users' browsers and successfully forwarded to Sprig, you can view visitors being created on your Sprig People dashboard. You'll be able to see visitor emails if being set, and when clicking on a specific visitor, you'll be able to see their User ID and any attributes set for them.
Segment - Track
More information on the Track method can be found here. An example call would look like this:
analytics.track('Clicked Button', {
  plan: "Pro Annual",
  accountType: "Facebook"
})
Use Track calls to track events and use them as filtering criteria for your studies, or to trigger studies. If, when a Track event is recorded, a study is in progress with that event as its trigger, and the current user matches any filtering criteria, the study will be triggered for the user. If event properties are sent, you can use them when selecting triggers on your study.
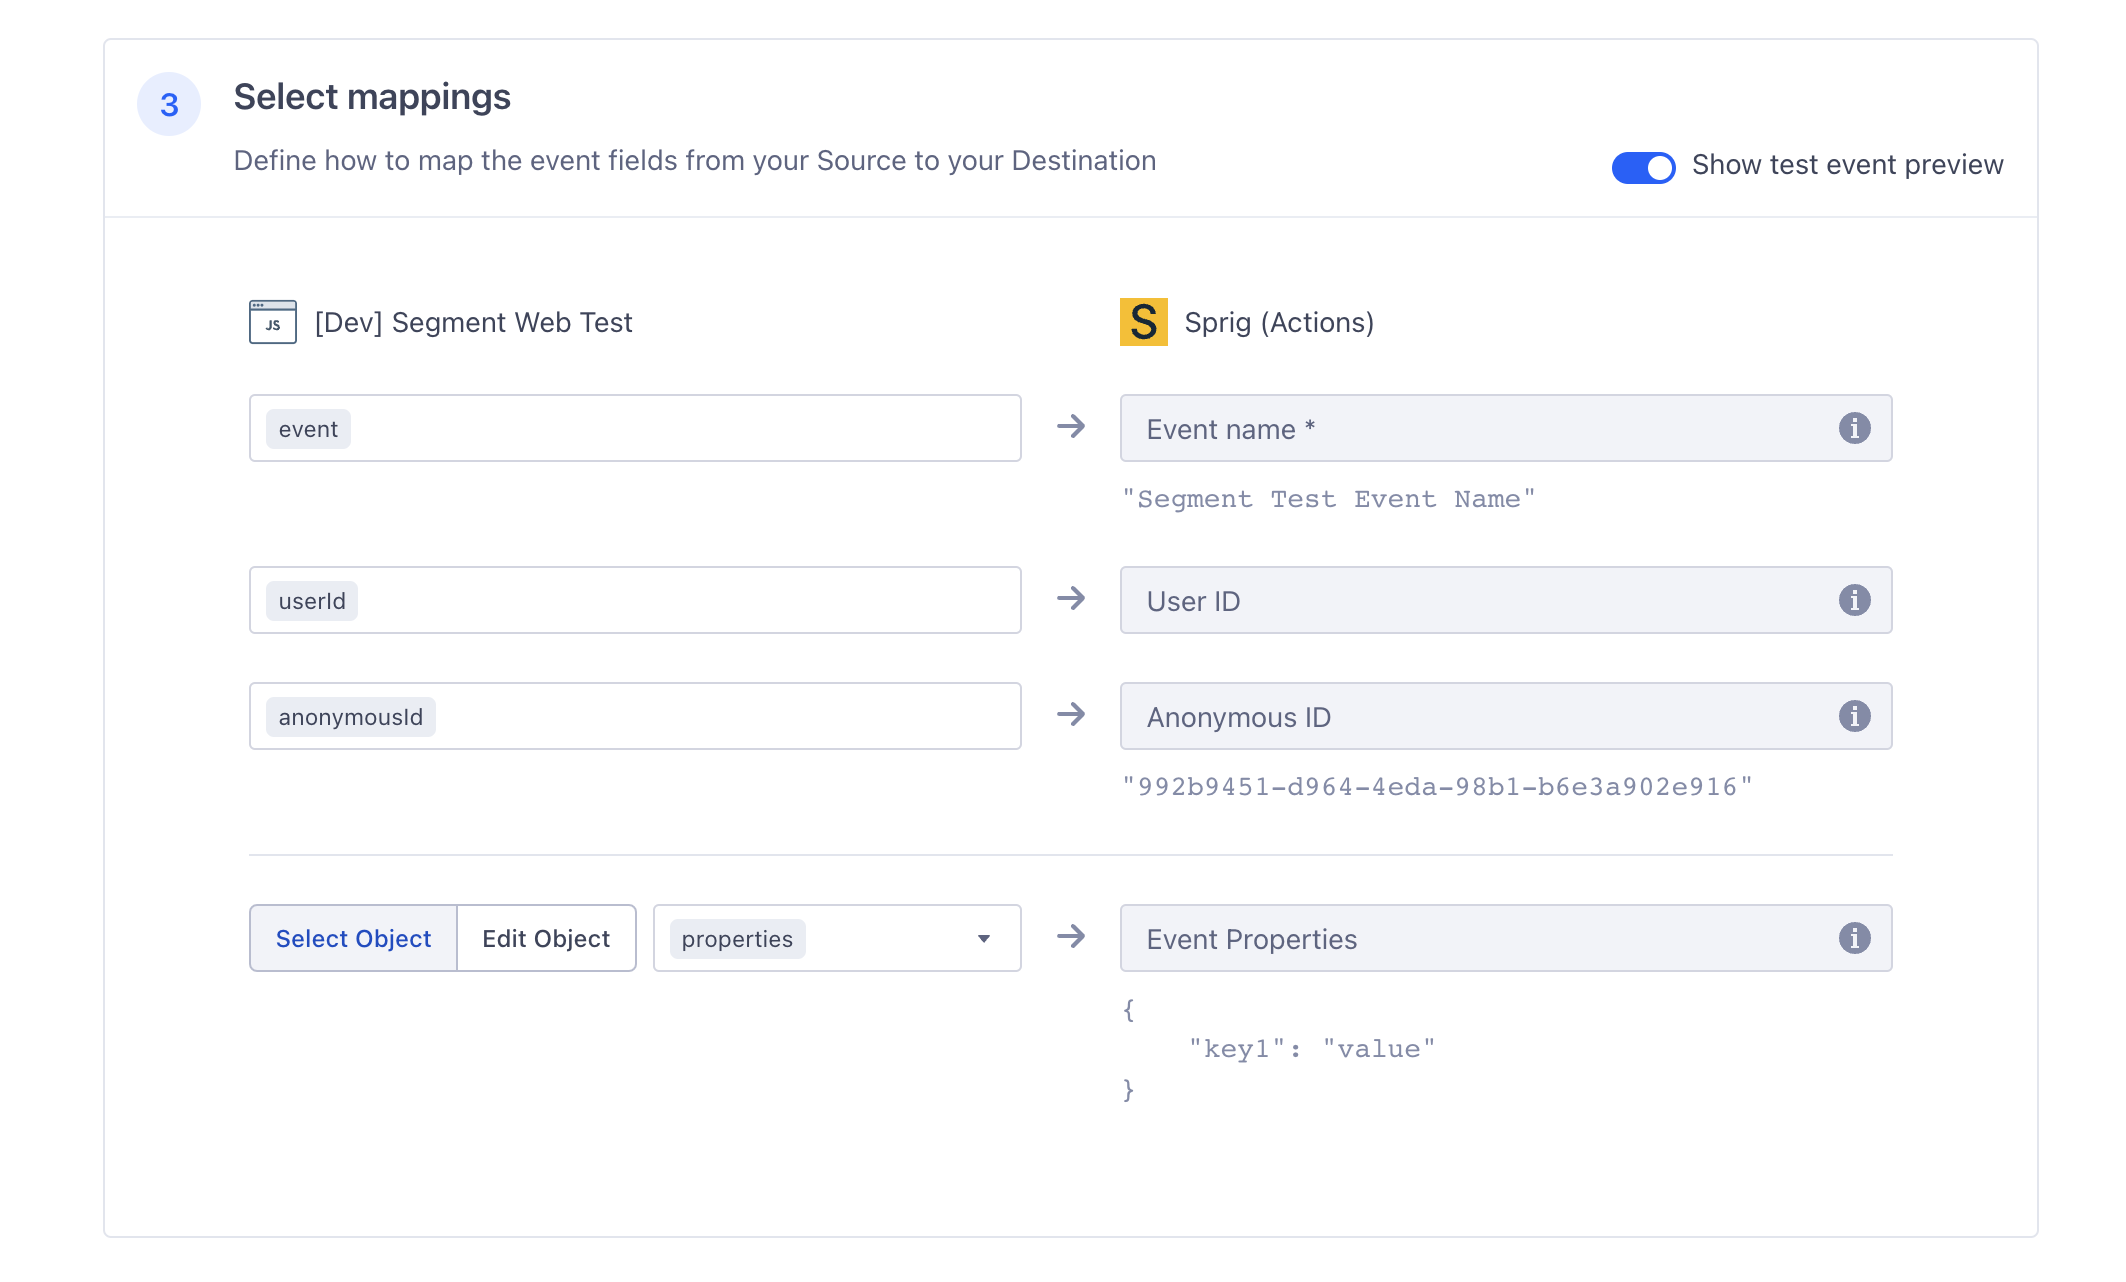
Be sure to configure the properties mapping within Segment for Track Event. You can find this by going to your Destinations > Sprig > Mappings > Edit Mapping.

Create Events in your Sprig Events dashboard and map them to your Segment Track event names before you start sending Segment data to Sprig.
Warning
analytics.track('Clicked Button')can only be used as a Study trigger when using Actions Destination Framework with JavaScript as the Source.
Validating Track
Once Track events are triggered and successfully forwarded to Sprig, you can view events in Sprig with the Usage column, by hovering over the icon in each row.
Segment - Alias
For more information on Segment Alias, look at this. An example call would look like this:
analytics.alias('newUserId');Sprig as a Source, Segment as a Destination.
Employ Segment Streams to sync Survey results to your other tools. Perhaps you want to send data from Sprig to Segment whenever a study response is collected? That data could then be exported to one or more of Segment's Destination integrations.
There are two steps to this task, 1) creating the Sprig Source, and 2) adding a Segment destination.
Sprig as a Source Features Supported by Segment
Sprig supports Sending study responses collected in Sprig to Segment each time a response is received.
Connecting Sprig to Segment
- Sprig currently does not appear as a Source in Segment, but you can set an HTTP endpoint as a source in Segment’s workspace to receive Sprig’s data as a stream. In Segment, click Connections, then click Sources.
- Search for HTTP in the Sources Catalog and click Add Source.
- Next, type in a Source name. As well as project-specific labels, consider incorporating the Sprig production and development environments in your naming convention.
- Type in the URL of your website and click Add Source.
- Click Copy Snippet and paste the code so that it is referenced in the
<head>section of all the pages that can display Studies. - Click Settings and API Keys.
- Click Copy next to Write Key.
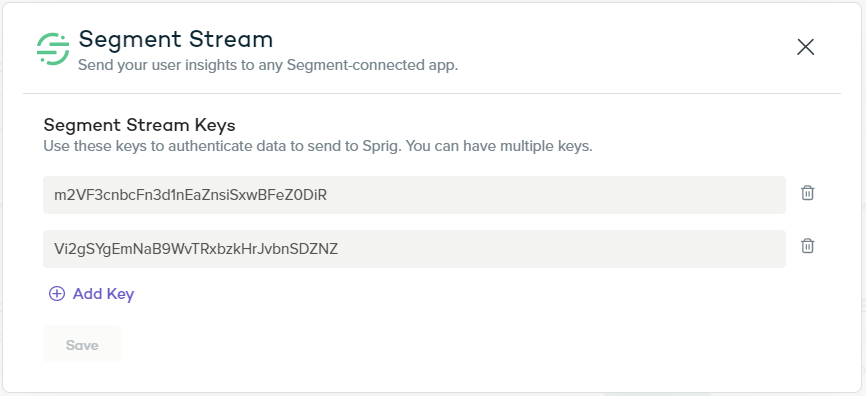
- In the Sprig app, click Connections. Under Sources, click Segment Stream.
- Click Add Key and paste the Write Key into the field.
- Click Save.

- Returning to the Source you just created in the Segment app, click Overview > Add Destination and follow the steps for creating a destination where you'd like to send study response data.
Troubleshooting installation
The Segment Write Key is unique to each source connected to Segment, so please check to make sure you add the right one, and that the environment in the Sprig Connect page in which the Write Key is set matches the Segment Source for that Write Key. For example, a source for your app's Production environment should be added to Sprig's Connect page viewed in Production.
A User ID is required to receive Sprig data in Segment. Sprig cannot respond to Segment if the study taker is anonymous: if the visitor does not have a User ID.
Integration data fields
This table describes the data that will be sent from Sprig's Segment Stream to your destination integrations.
Name | Description |
|---|---|
userId (required) | Also known as |
event | Name of the action that a user has performed. We will use |
properties.surveyName | Name of the survey |
properties.surveyId | Uuid of the survey |
properties.createdAt | Timestamp when the survey was created (ISO-8061 format) |
properties.question | Question text |
properties.questionType | Question type |
properties.visitorId | Uuid of the visitor who submitted the response |
properties.oldVisitorId | [deprecated] Legacy identifier of a visitor. Different from visitorId (uuid), oldVisitorId is a number |
properties.responseGroupId | A response group is a set of responses for a visitor for a given survey |
properties.response | The survey response to the question |
properties.email | Visitor's email |
properties.attributes | Other attributes of the visitor, like plan, company, role etc. |
properties.triggeringEvent | The label of the event that triggered this survey. Can be NULL |
context | Dictionary of extra information that provides useful context about a message. Each call is required to contain a |
sentAt | Timestamp of when a message is sent to Segment |
receivedAt | Automatically set by Segment, the timestamp of when a message is received by Segment |
timestamp | Timestamp when the message itself took place, defaulted to the current time by the Segment Tracking API, as a ISO-8601 format date string |
type | Type of message, corresponding to the Segment API method: |
Updated about 2 months ago
