To enable SSO with Google Workspace, complete the following:Documentation Index
Fetch the complete documentation index at: https://docs.sprig.com/llms.txt
Use this file to discover all available pages before exploring further.
- Contact support@sprig.com to claim the email domain(s) that your SSO users will use to sign in.
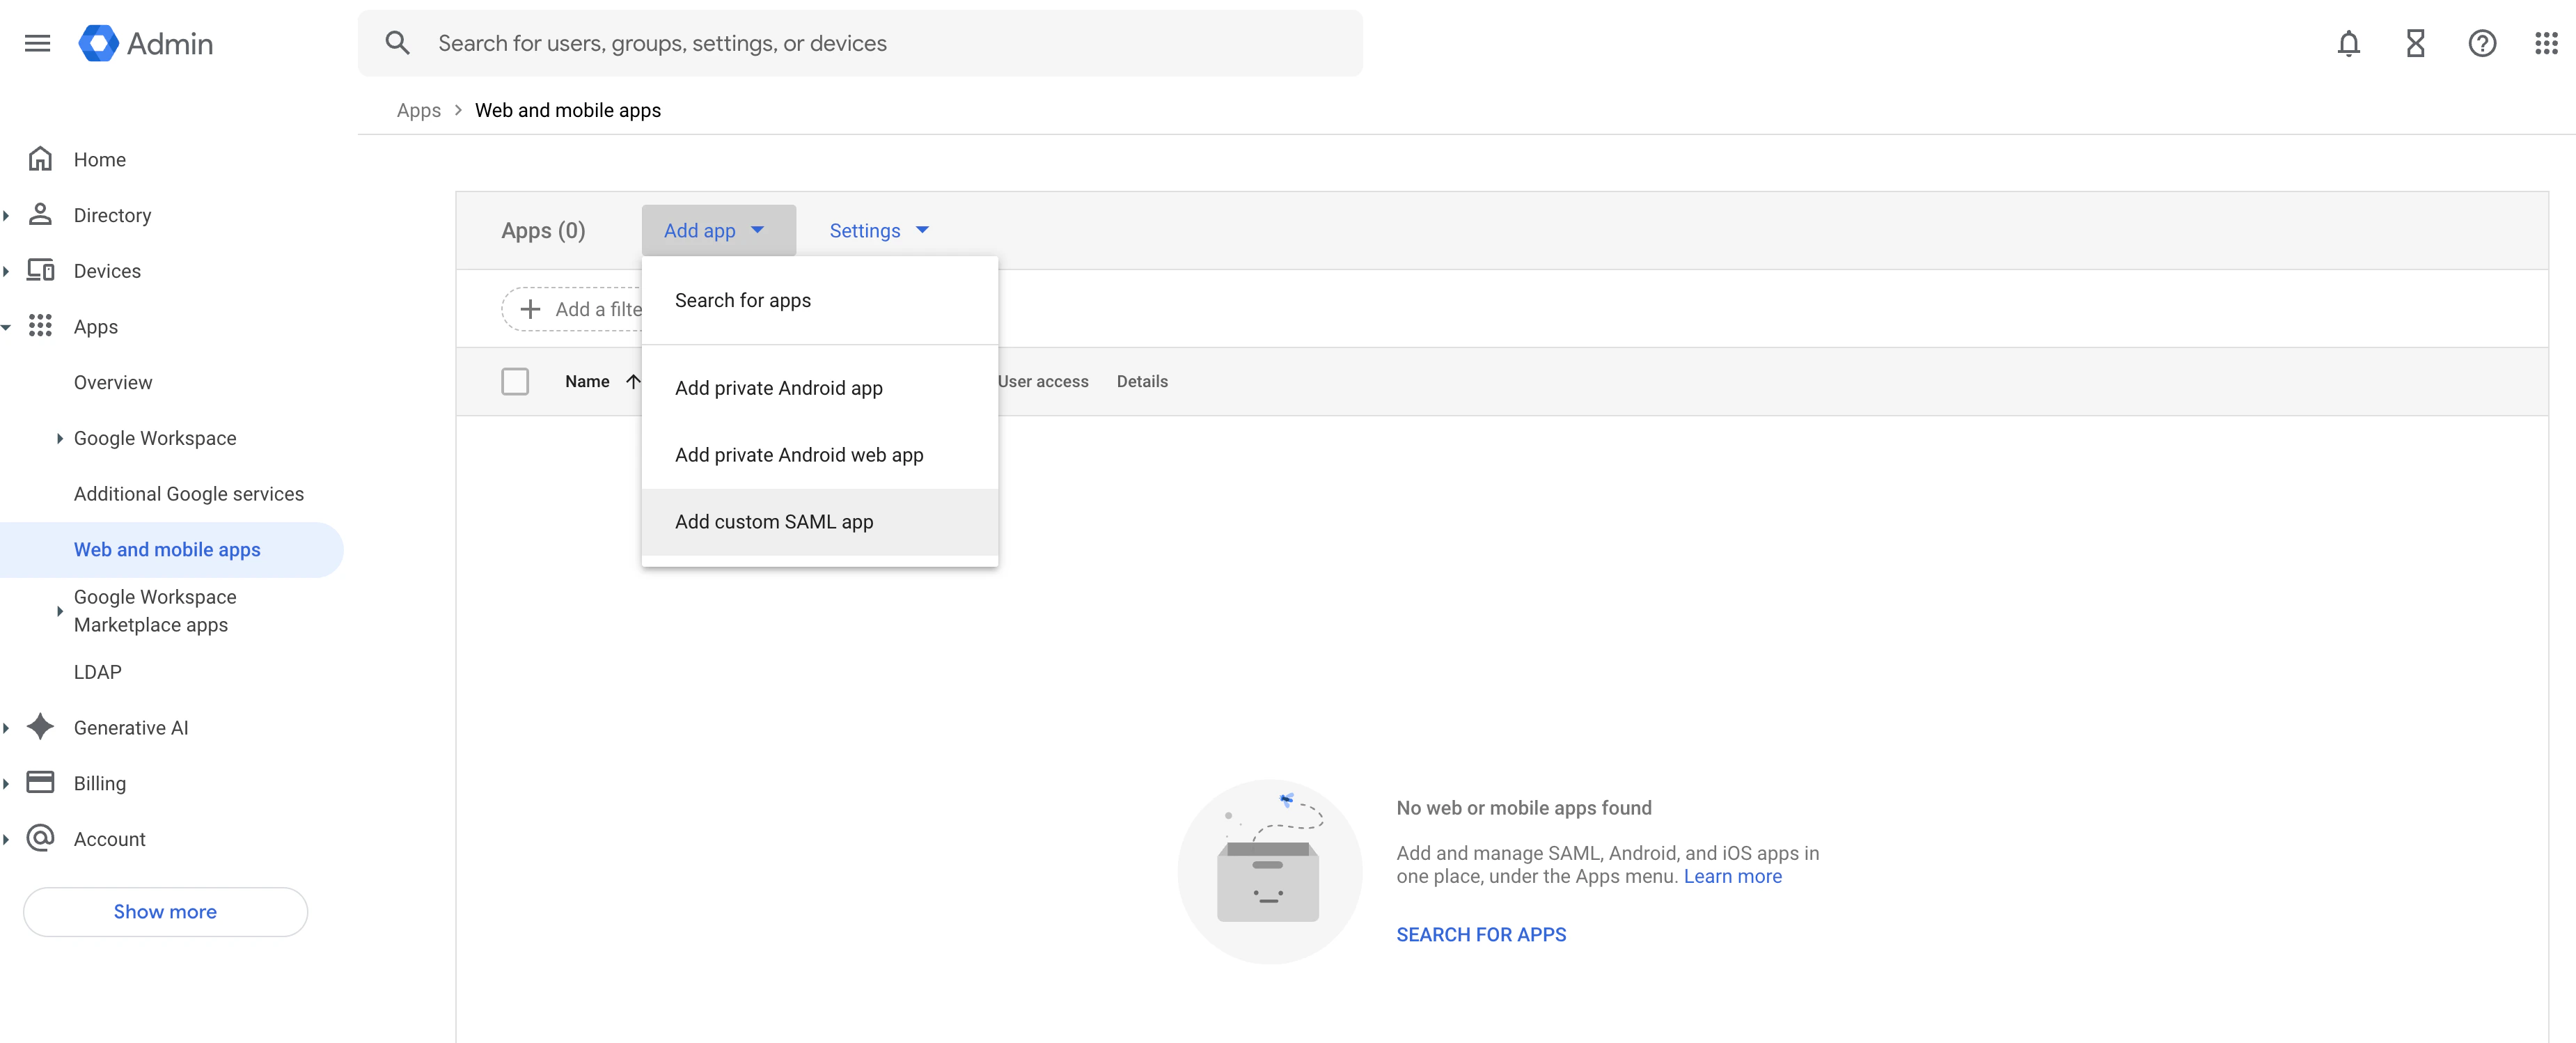
- Set up SSO with Google Workspace: log in to the Google Admin console and navigate to Apps > Web and mobile apps > Add app > Add custom SAML app
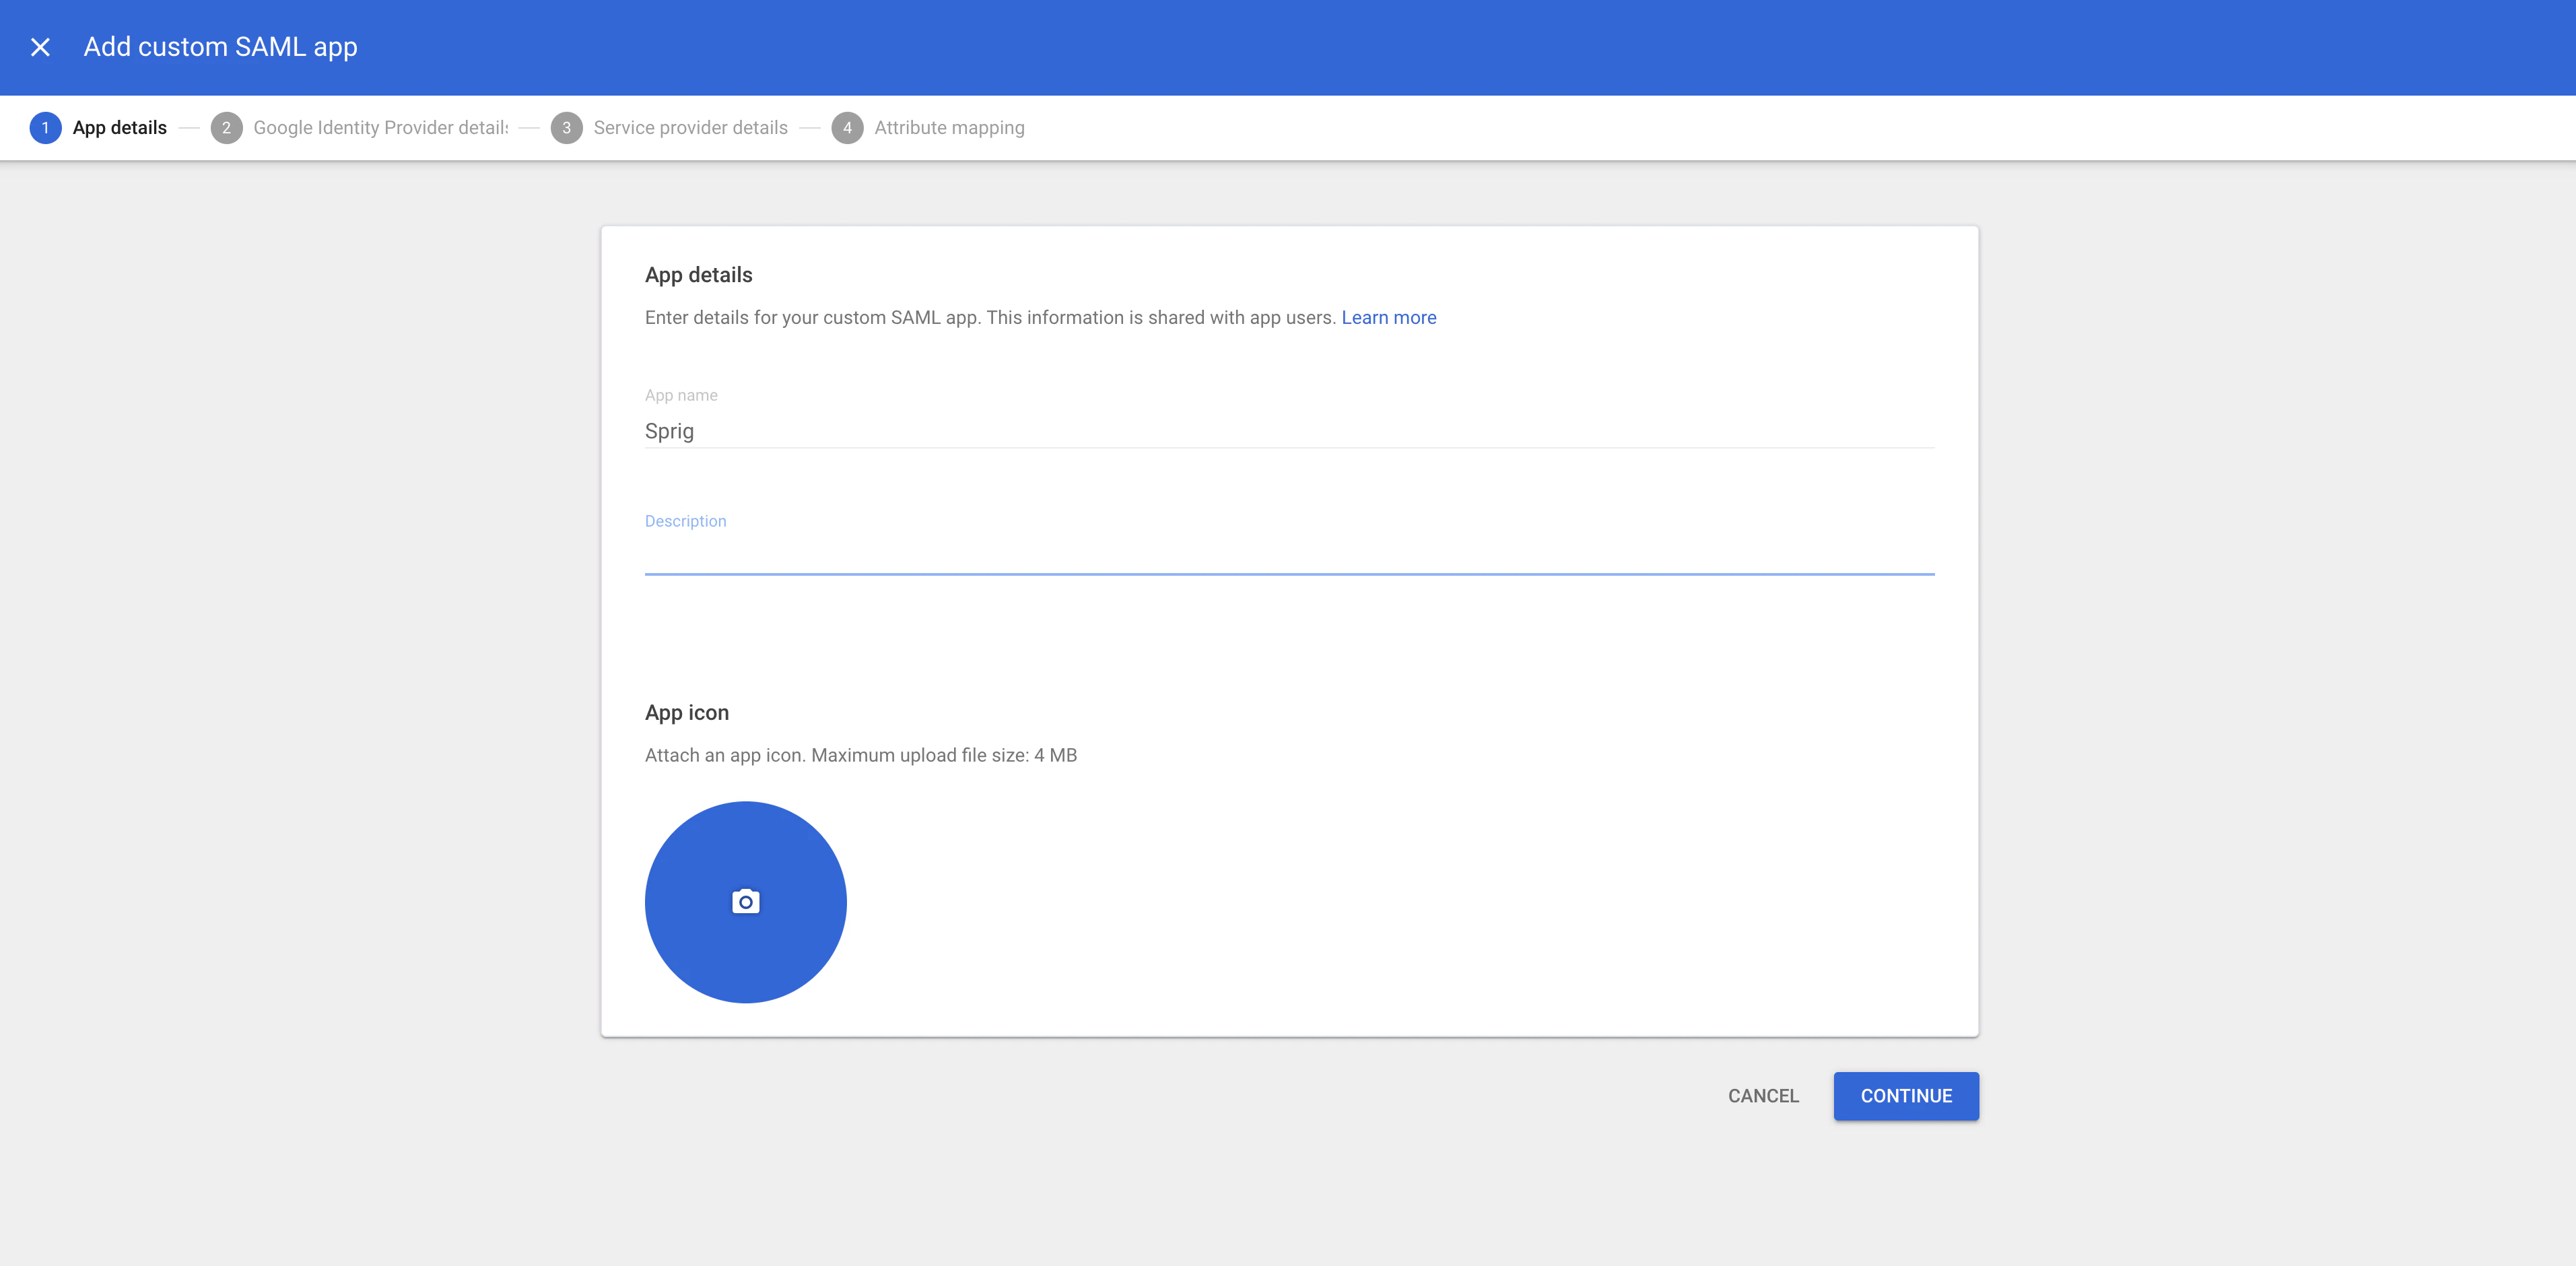
- Proceed through the custom SAML app creation steps, first entering an App Name and description.
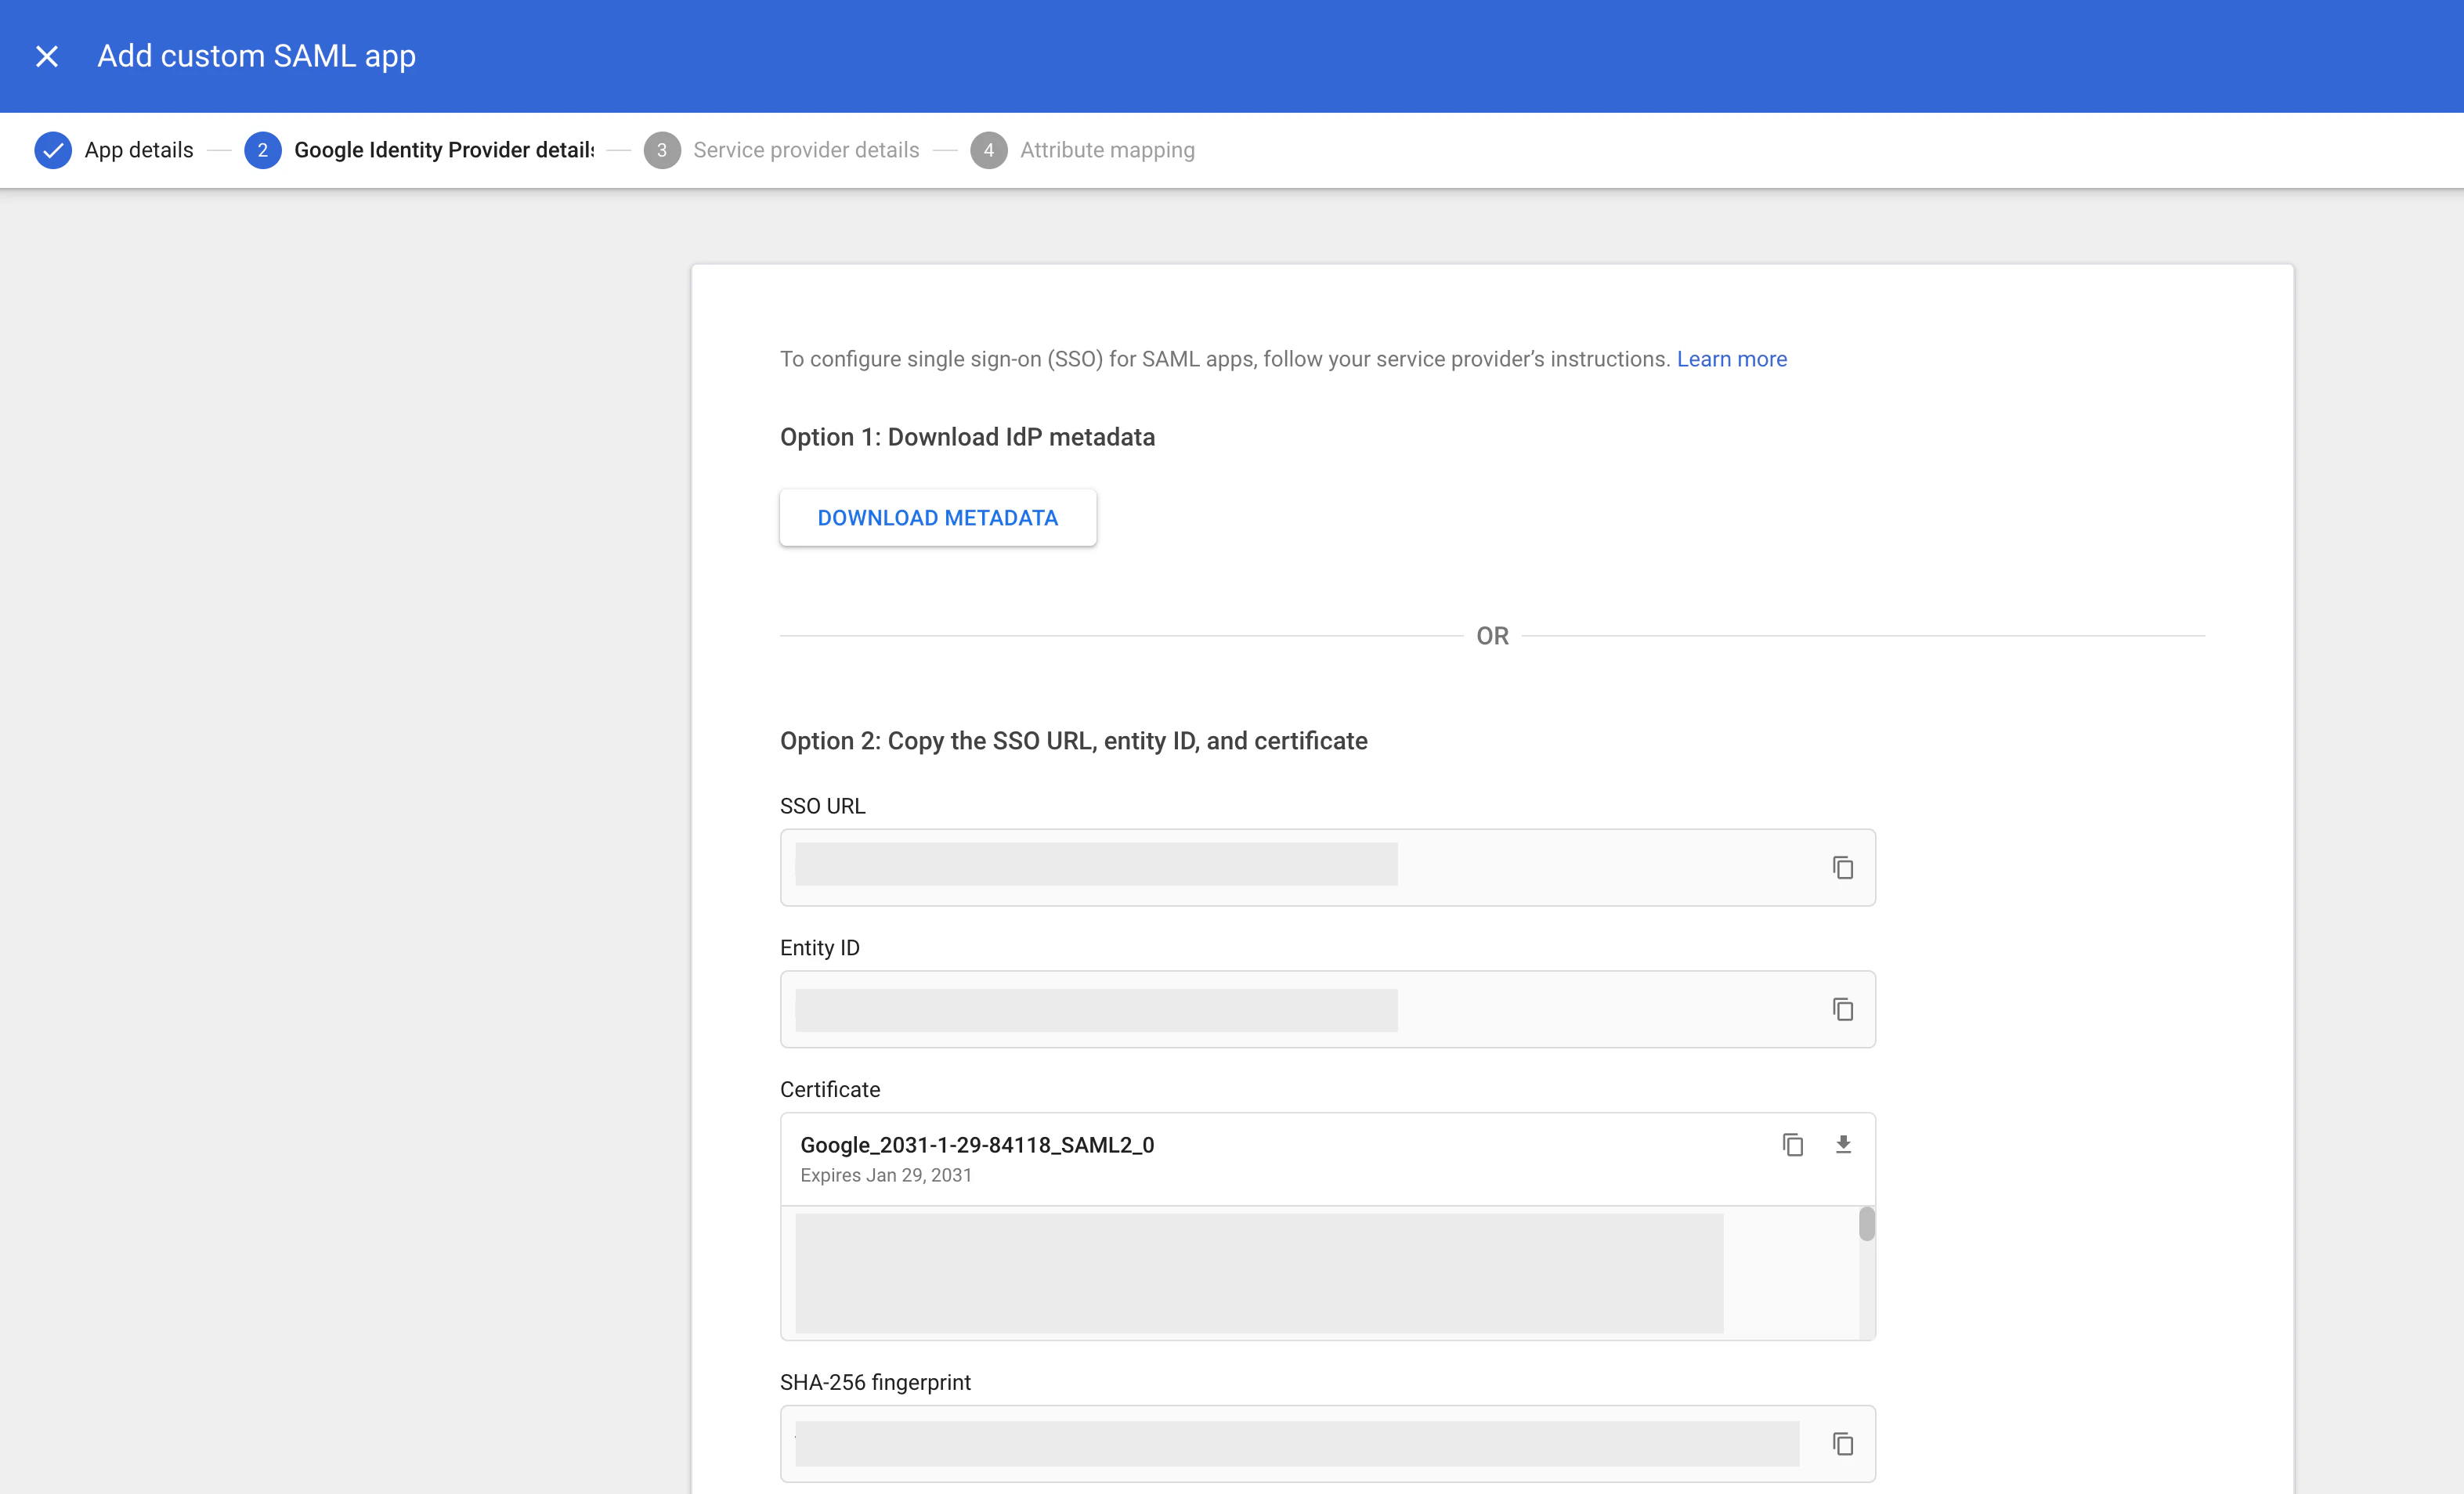
- Download Metadata: In the “Google Identity Provider details” window, download the IDP metadata file or copy the SSO URL, Entity ID, and Certificate
- Log in to your Sprig account and navigate to Settings > Single Sign-On.
- Select the SSO Enabled option, and click Save.

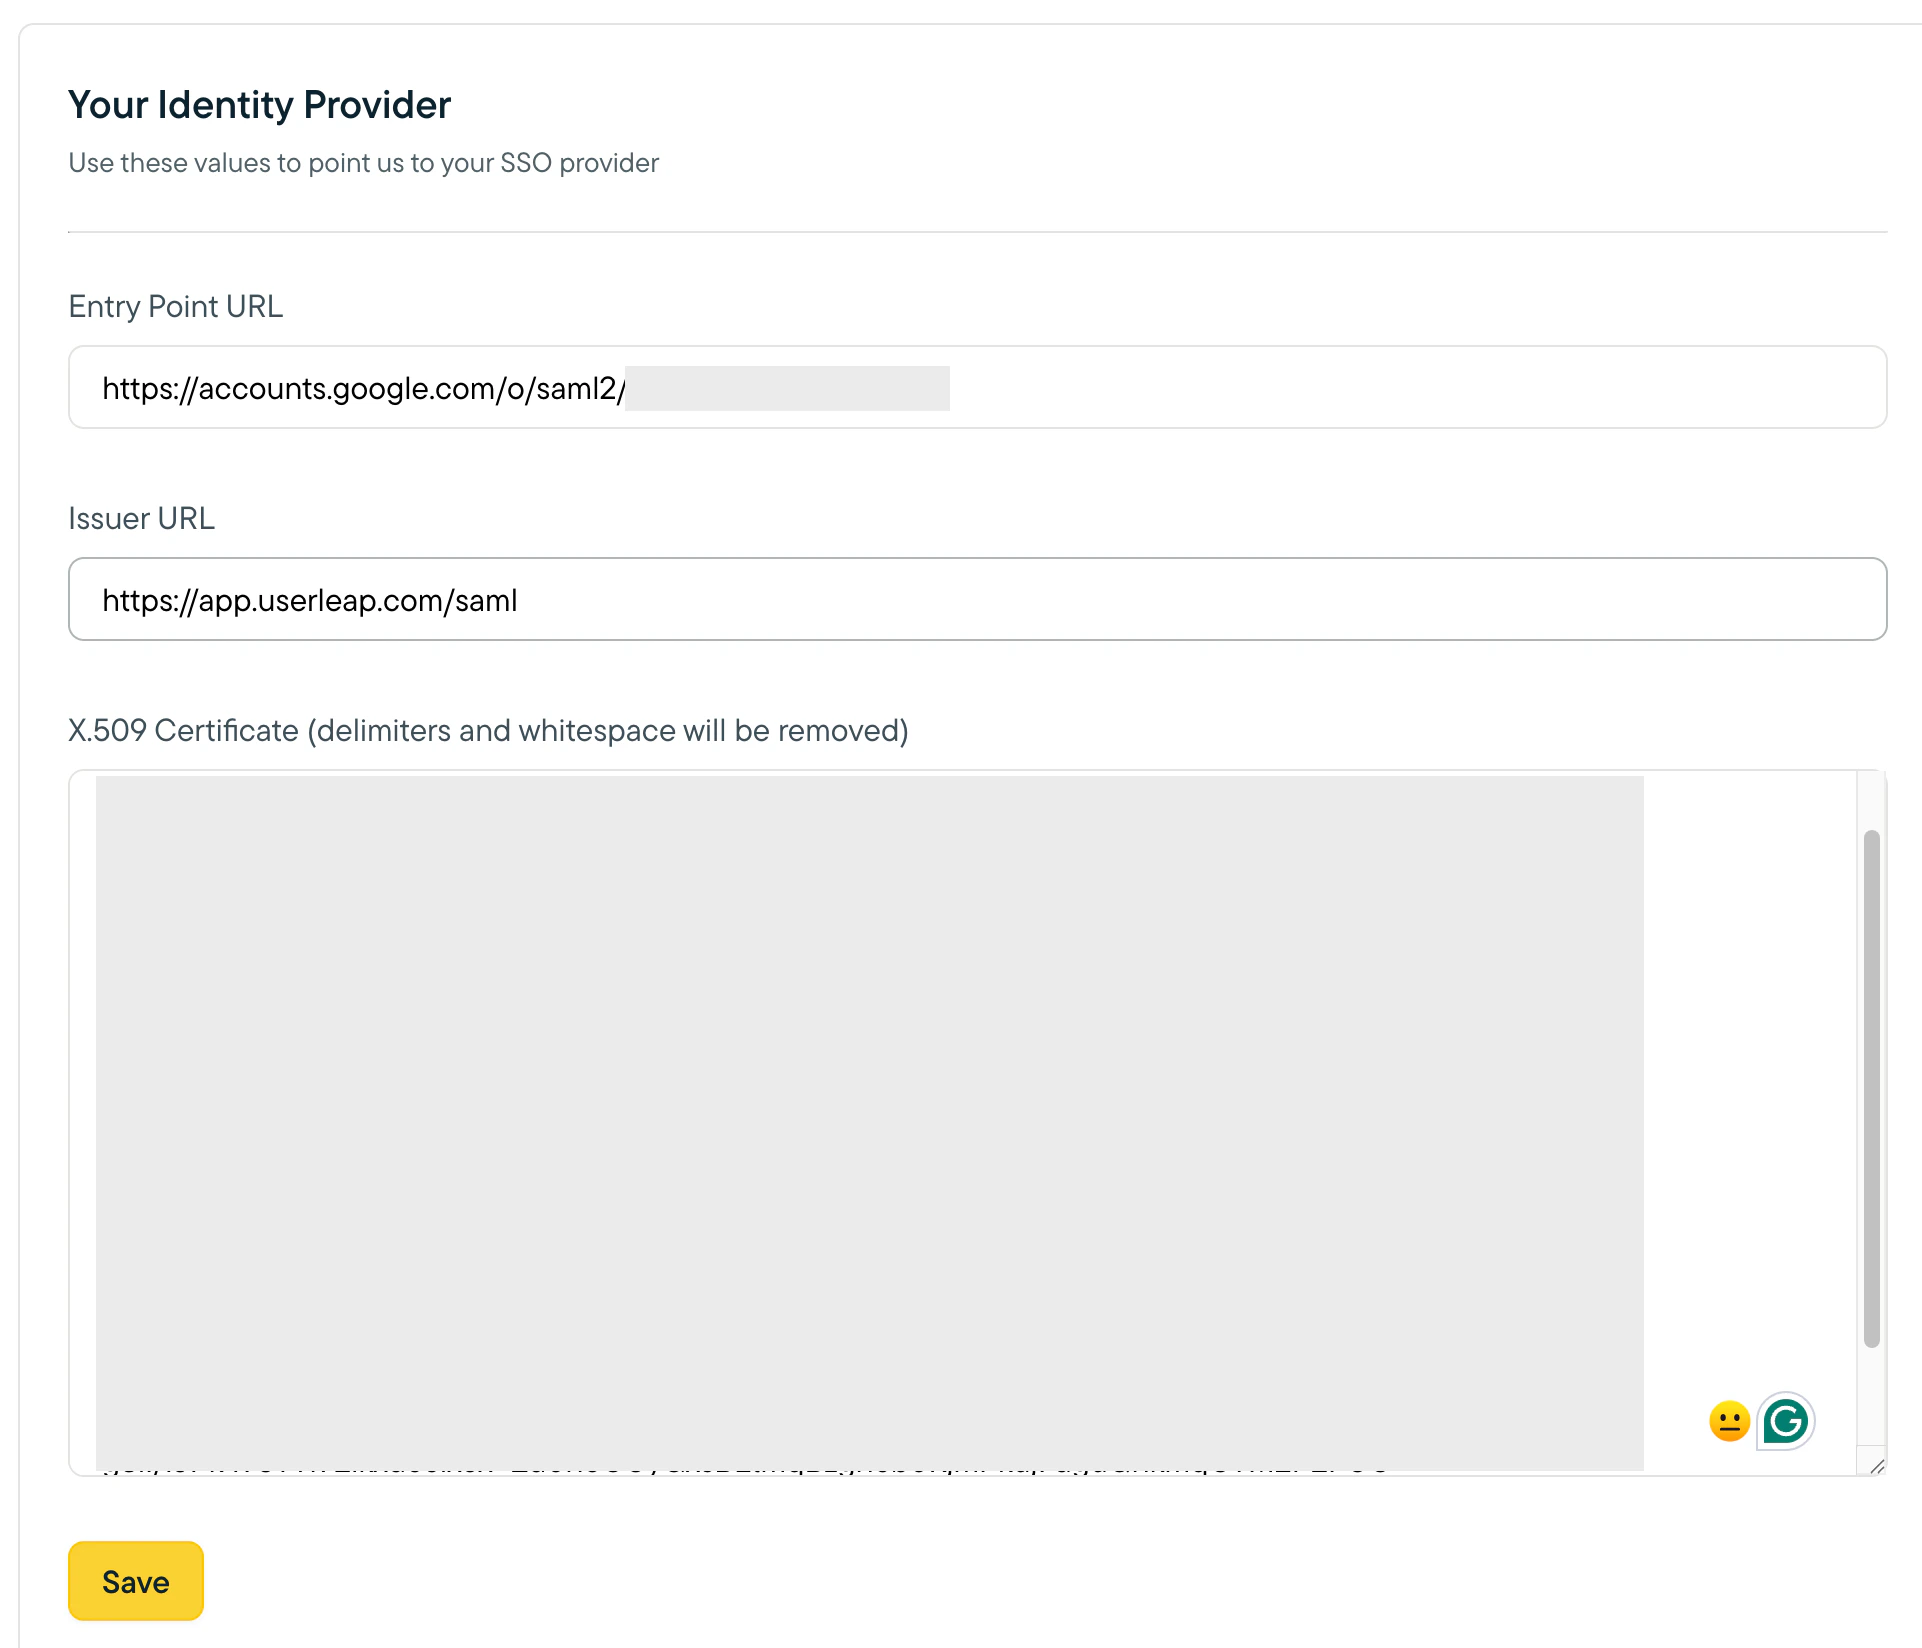
- Navigate to the Your Identity Provider section at the bottom of the page.
- Set the value of Entry Point URL to be the SSO URL from your Google metadata
- Set the Issuer URL to be the same value as the Entity URI from the Important Values section (this should be https://app.userleap.com/saml).
- Finally, copy the Certificate from your Google metadata into your Sprig SSO settings and click Save.
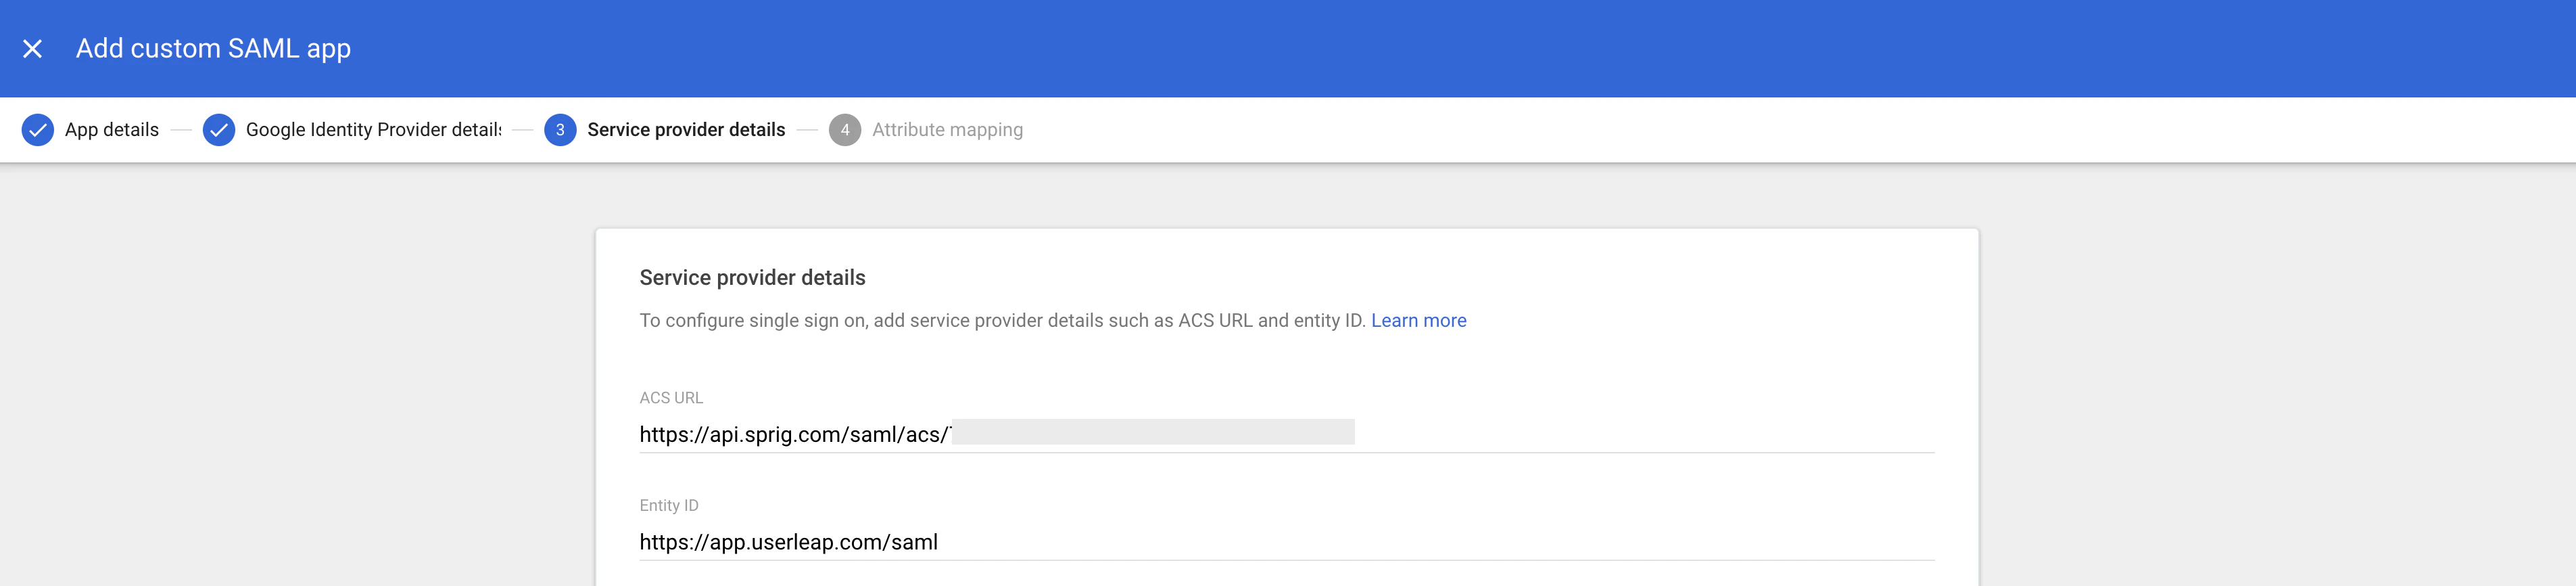
- Take note of the Entity URI and the ACS URL values provided by the Important Values section, as you will use them in your Google Workspace client configuration.
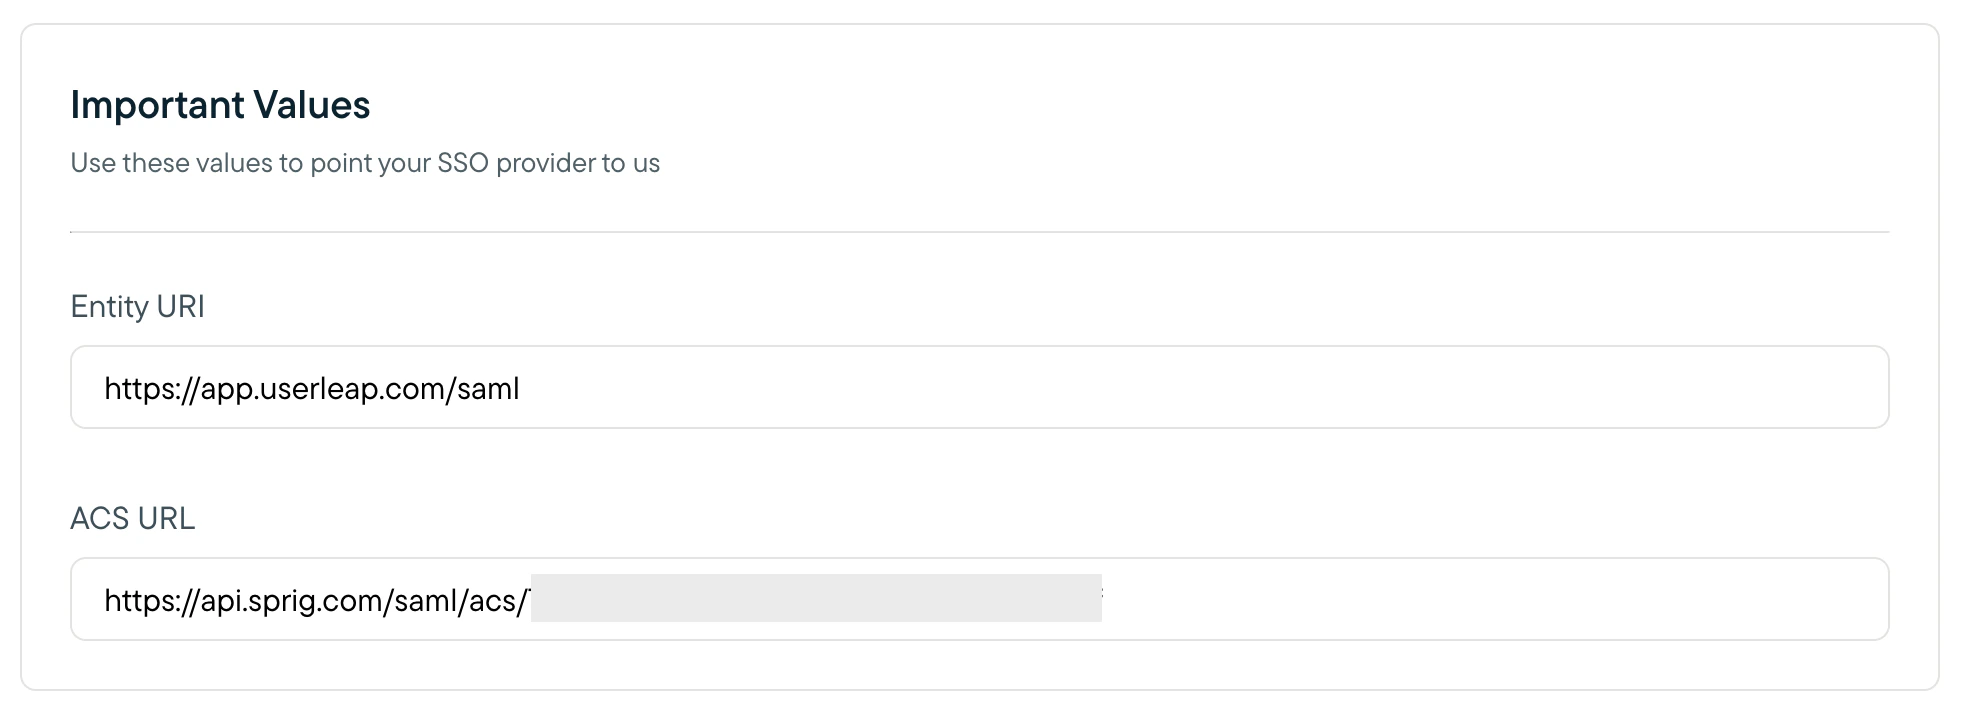
- Back in your Google Workspace SAML App setup, enter the Important Values from your Sprig SSO settings.